Thursday, November 3, 2011

The Hammer Beam Low Table . . . and Stumbling Through the Design Process


I would never have become a custom furniture builder had it not been for my time living in the UK.  My mind was open, I was surrounded by thousands of years of history, and I was exposed to rich palate of art, design and architecture.  And although there were some disappointments (Stonehenge, Marmite, Stoke-on-Trent), there were several things that just blew me away -- The Devonshire Hunting Tapestries in the V&A, Supermarine Spitfires . . .  and the Hammer-Beams in Westminster Hall.  Built in 1393, this ingenious system of timbers changed the architectural world forever, and made a statement about where England ranked in the medieval world.

This image has been bouncing around my head for awhile, and as I start to apply this style to a piece I'm working on, it made me think a bit about how I go about designing a new piece of furniture.  I'd be interested in hearing how you go about this process as well.

For me, I think I start by asking myself a series of questions -- not always in this order -- and not usually in quite such an organized way. 

What is the function of the piece?  Is it a table, a chair or a desk.  Regardless of how creative I want to be, there are conventions that I feel comfortable working within.  If I stray too far outside the norm, I move from working furniture, to studio furniture, to contemporary art -- and I don't have the design chops to hang with that crowd.  (In this case, it is a low table that can be shipped, flat, and may become part of a "line" of furniture that I debut in September.)

For whom am I making this piece?  Is it a custom one-off, or will I want to replicate it.  Is it built on spec, for a specific individual, or for myself.  This will determine whether I deviate from standard dimensions, keep a build diary, or alter my method of work for replication.  (I hope to build again, and it should be robust and appeal to people who prefer arts and crafts style custom furniture.)

I start with a big piece of paper, a T-square, a ruler, and some idea of what I want to build.  This is the base of the table.

What is the major design element?  Whether it stays within a particular genre, or pushes forward a single visual element, it needs (for me) to have a "plot" to it.  "This is my interpretation of a Morris chair", or "I'm going for a Usonian credenza look," is enough.  I like designs that are fairly singular and can be articulated. (English arts and crafts, Gothic/Gothick, Cotswold's style.)

What kind joinery will be used, and is that joinery part of the design (dovetails) or merely functional?  This generally raises other questions about cross grain situations and mechanical fasteners.  (modified mortise and tenon, both for function and show, and the design provides some efficiencies.)

The bending strip allows me to play with the curve using nails to adjust and hold the bend in place.
 Is this a machine project or a hand tool project?  My work seems to be primarily one or the other (with obvious exceptions.)  Before I start, I want to make sure that I have the proper tools on hand.  (Alas, it is another machine project, but there is some hand work.)

Can I visualize the order of operation?  I always get into trouble if I don't thickness all relevant stock at the same time.  Also, if there is a fussy machine set-up or cobbled together jig, I want to do it once and move on. (It's pretty straight-forward.)

Once I like the bend, I create a 2 3/4" radius circle out of fibreboard that allows me to trace a line 2 3/4" away from the curve to create a design element.

 Do I need to create a drawing (probably), make some templates (usually) or build a mock-up? (not that often)  (Absolutely jigs for the curved bits, and a drawing from which to make templates.)

What wood will I use? Which prompts the question, "How will I finish this piece?"  If the wood is particularly pricey, I may actually opt to do the mock-up. (Oak, with QS Oak or Pippy oak on the top.)


What will be the biggest challenge?  There is usually one part of the gig that wakes you up in the middle of the night.  If I'm in game-shape, and in my stride I may start with this to ensure that I can do it properly -- then everything is downhill sledding.  Or, I may want to refresh those skills on another part of the project and "work myself into shape" before I tackle the line of dovetails or that turned leg.  (Bread board top.  It's not too difficult, just time consuming.)

Is this piece "The One"?  Every artisan that I admire must have made his or her first signature piece without knowing that it would define their career.  Can I see the potential for something important in the midst of the inevitable frustrations of a first build.  (Who knows, but I do think there is a theme upon which I can expand.)

A sneak preview of the bottom portion of the table leg.  This is the only part of the design that I feel is complete.


Cheers! - And let me know about your design process!

Saturday, October 29, 2011

Tele Style Guitars from Scratch -- The Double Bound Tiger Sycamore Version


I know that autumn has arrived when I pick up the guitar.  It starts with playing through my journeyman renditions of Beatles, Roy Orbison, and Van Morrison tunes, and ends with me trudging through several pages of various jazz guitar books.  "Now is the time to get that band together, start playing out.  If I really push, I'll be stage ready in less than a year, I'll only be XX, and who knows what will happen."  The fantasy generally ends when the daffodils come up in the spring.

But along the way, I always entertain thoughts of becoming something of a luthier -- and it seems that this road starts with solid body electric guitars.  A couple of years ago I made a Telecaster style guitar for my daughter from a Grizzly kit.  It turned out well, and somewhere along the line I made a few neck-building jigs.  But alas, something shiny caught my attention and I moved on to another obsession.

So now, at least for a while, I'm tilting at the luthier windmill once again.  First, let me say that everything I'll talk about, and much, much, more is available in detail on the excellent TDPRI site.  It includes a robust and active forum on all things Tele-building, and the members are quite eager to share their expertise.

My project starts with some walnut that I had gathering dust, and a short piece of figured sycamore that I picked up at my supplier.  I'm building two bodies simultaneously since the first may end up being sacrificed to the learning-curve gods.  After downloading the acknowledged best template (quite generously developed/drawn/posted by Terry Downs and used by nearly everyone) I set about building the templates that will allow me create the finished product, 


I first glue the paper printout to posterboard, cut this out, trace to and cut 1/4" plywood.  This is sanded and adjusted and finished until you are happy with the pattern.  From this you trace and roughly cut a 3/4" plywood version.  Finally, using a 1/2" bearing bit, use the 1/4" version to make your exact body replica that is 3/4" thick.  For me, this chunky template is the easiest from which to work.

You will also need a second template from which to rout the cavities for the pick-ups, controls, and neck mount.  You really must make this second template since it must be over-sized to accommodate the router to cut the neck pocket.  I also made a third template from which to cut and f-hole for a thinline version.


I start by drawing the outline onto my stock and cutting on the bandsaw.  I then attach the template to the stock, via screws that attach in areas that will later be routed out for neck and pick-up cavities, and rout to final shape.  BEWARE . . . even with the very big 1/2" template bit, you must follow proper downhill routing techniques around corners to avoid catastrophic tear-out.  There are spots where climb-cutting is appropriate, but hold on as this bit is a monster and can throw your piece across the room.  Once complete, I set this aside.


I then resaw, bookmatch, and glue up the sycamore caps.  These just fit in my drum sander and it makes short work of truing the 1/4" "veneers."  I did hit one detour, however.  A standard Telecaster is approx. 1.75" thick, and I only took into account one 1/4" cap in the thickness.  This meant that the body needed to go back into the planer to remove another 1/4".  By placing the body on a sled, and attaching blocks at the front and back to stop any snipe, I was able to run it back through the machine. I don't, however, recommend this "out of sequence" plan unless you are feeling lucky.


Once dry, the sycamore is rough cut and glued to the faces of the walnut body. 


Out of the clamps, it starts to look like a guitar.  I'm now at a fork in the road.  I could (1) rout the edges and install a cream colored binding, or I could (2) mask the lighter sycamore edges and finish creating a "faux" binding,  As my brain hurts from all this research and thinking, I'm going to sleep on it for a couple of days.


BTW, I'm also looking to begin studying, in earnest, the steps for building an acoustic guitar.  In order not to post too many things about guitars, I'll chronicle these projects in fits and starts -- mixed in with a couple of commissions I have on the boil.

Next up, routing cavities and building a thinline body.

Cheers!

Saturday, October 22, 2011

Prairie Chair -- Assembly . . . and Advice I Should Give Myself


Well, many distractions have come between me and the Prairie Chair this month. And I'd be lying if I said I wasn't sick to death with the thing.  Its simple lines tend to highlight any minor errors, and quartersawn white oak is rough on your tools, your lungs, and your patience.  But after a few false starts it is assembled and ready for finish.


In my defense, I am in the middle of a big landscaping project that requires lots of  stone wall building, stair construction, and fooling around with the tractor -- all of which I enjoy.  But I'm constantly shocked by how my summer hiatus has taken a toll on my skills.


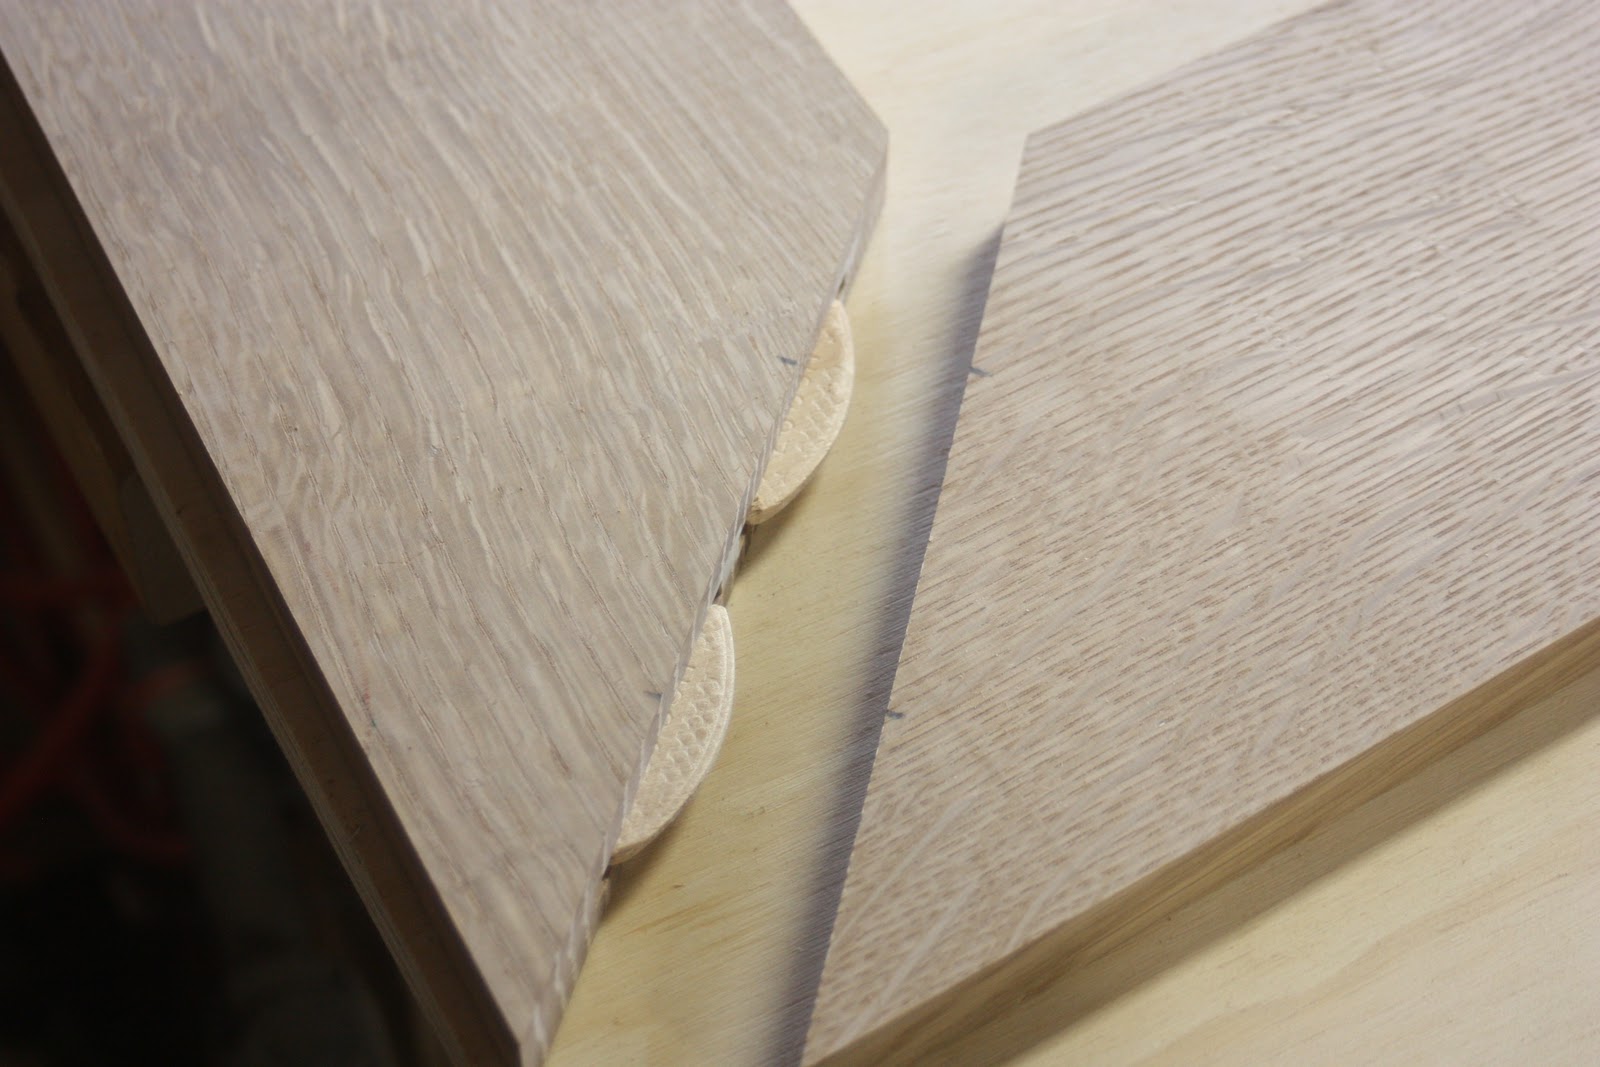
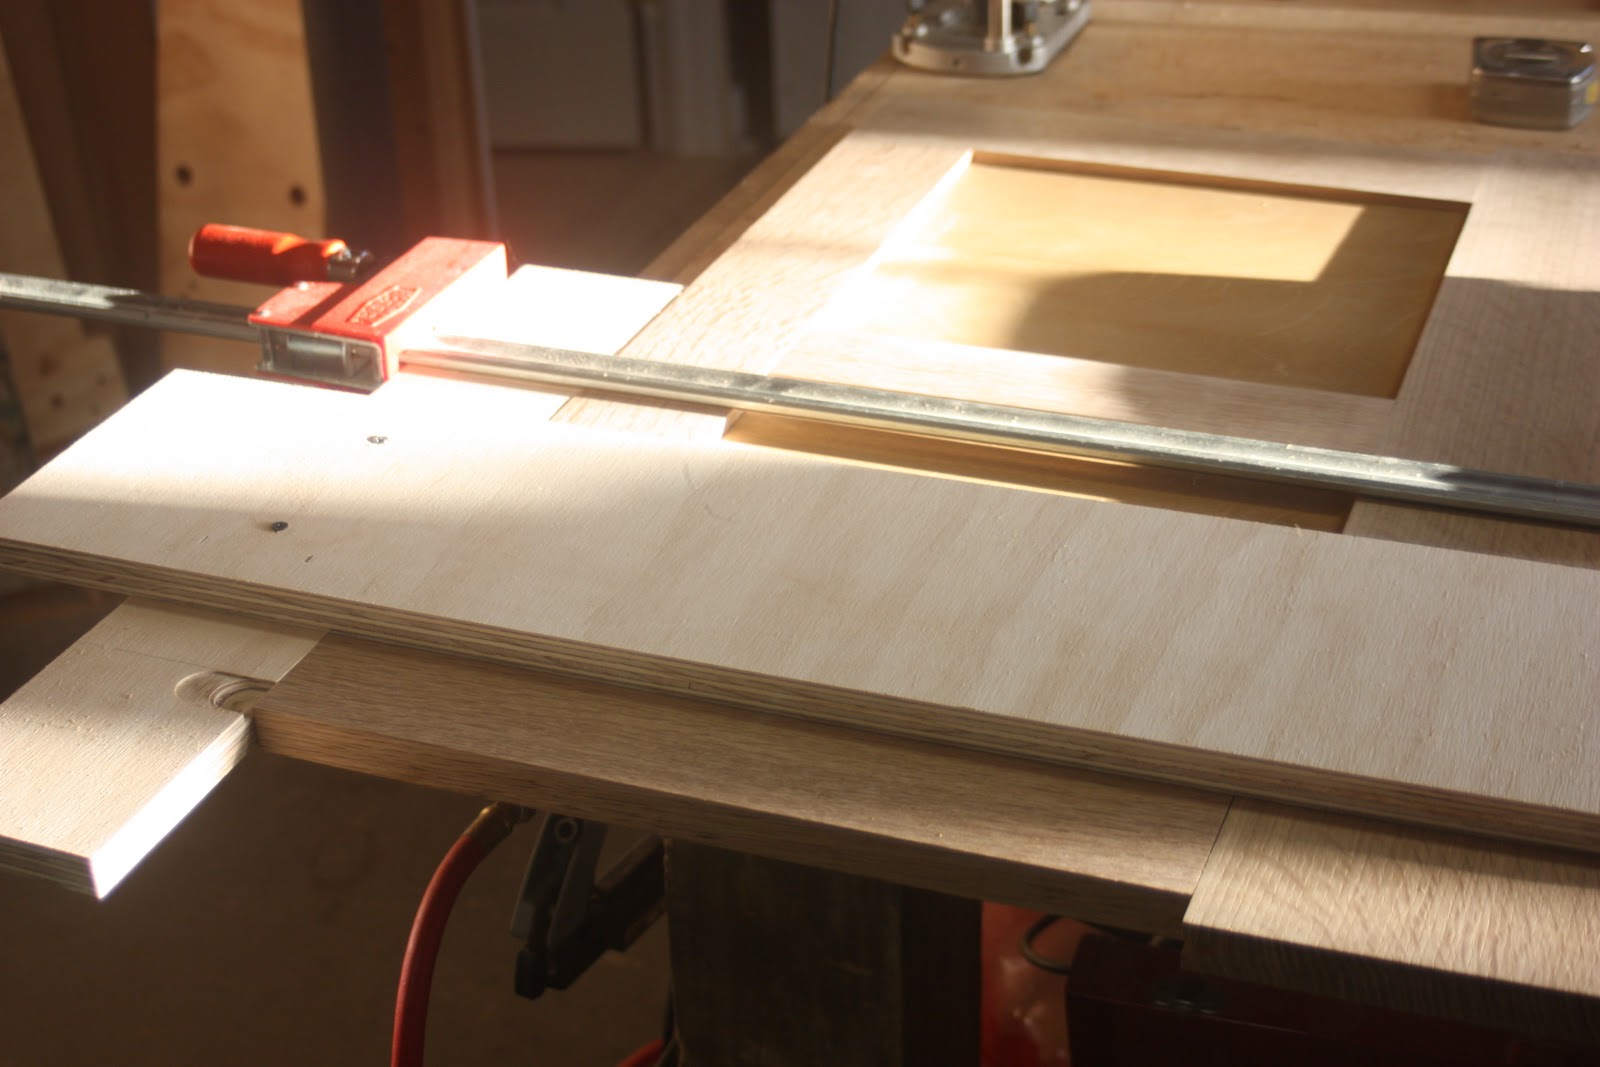
 Using biscuits (both for alignment and strength) I glued up the arm assembly.  The 45 degree angles were correct, so everything was square upon completion.  If this is not the case, the priority is to glue this tight as any "non-squareness" will be undetectable and no dimensions depend on this being perfect.  I glue and transport this on a a large piece of plywood as this is very prone to racking.


The next step is to rout the grooves in the legs -- some grooves for the decorative corbels (1/2" deep), some for the side and back panels (3/4" deep.)  Cutting these grooves on the router table is machine woodworking at its worst.  I find that if I use the 1" ring with the 1/2" spiral bit, and collect dust from underneath, it helps a bit.  This has convinced me that (among other things) I need to invest in a good respirator.

Routing the corresponding tenons in the panels, in a dead straight manner, is critical to the fit of the chair and is where big mistakes can be made.  In this case, my inattentiveness resulted in one side panel that was out of square by about 1/8". It is amazing how a small error magnifies over the length of one of these large panels.


I fix this by squaring each side with either the top or the bottom.  If you square one to the top and one to the bottom, you will end up with a parallelogram.  Also, you need to complete the out-of-whack panel first, as it will reduce it in size by the amount that it is off.  I use a dead-straight guide on which I can run the router on either side, squaring it (in this case) with the top rail.  This squares the exposed bit of the panel, and makes the tenon slightly askew -- which can be be trimmed.  I use a 1" straight cutting bit and set it to the depth of the previously completed corbel tenons.  Now use this corrected panel to set the dimensions on the opposite panel.


The back bottom rail and the front rail have tenons that are a full 1 1/2" deep for stability.  I cut these after the main grooves are cut with a plunge router.

With these long grooves and when using white oak,  I've found that tenons cut to the exact width may need a couple of passes with a rabbet plane to slide into place -- which is fine.  A dry fit shows that things are now square and final sanding (which is not worth blogging about!) can take place.  All that's left to do is glue, finish, and haggle with the upholsterer.

So, what's the advice to myself?

1.  Perfect sub-assemblies increase your chances for a perfect final product
There are too many moving parts and not enough reference points to ensure that each panel hits its marks in one glue up.  I should have glued up the top rail and side stiles with the panel in place, let that dry, and then slid it in place on the bottom rail.

2.  Tenons should fit under the pressure of your hands, not a mallet
On the panel that was out of square, it seized up because things were too tight.  Adjustment were impossible when the application of glue swelled the joints.

3.  I've got to get a handle on the dust situation
I'll always be a hybrid woodworker, and my current Delta 1.5 hp system is not cutting it for sanding and routing.  I'm actually thinking about going the Festool Rotex 150 route with their mid-sized dust extractor unit.

4.  Square and true don't just happen by eye -- no matter how cocky you feel

5.  Never rush a project to get out a blog post


I'm happy to have this in the rear window as I have two projects lined up that should be fun.  The first is a tiger sycamore tele guitar that I'm building from scratch (I've assembled a kit before), and an original design for a table that is loosely based on my love for Westminster Hall's hammer beam construction.


Cheers.

Wednesday, September 28, 2011

Prairie Chair -- Frame and Panel Construction


In many ways, making prairie-style furniture is like building a series of cabinet doors and sticking legs on them.  It requires only the foundational skill of frame and panel construction.  And because quarter-sawn white oak is fairly tough, some robust stationary equipment.  I wouldn't want to contemplate building this as a hand tool project.


Setting the quadrilineal legs aside, I start by building the frames, and then building the panels to fit.  I started with plans from Robert Lang, but have modified them over several iterations and worked out the bugs.  All stock is 13/16" thick, and all grooves start at 1/4" wide by 1/2" deep.  On my notes, I draw boxes around dimensions that are gross (including tenons) and then write tenon dimensions next to these numbers.  To avoid confusion, I write the distance between tenons (the net dimension) in another place.  The frames come together quickly and I dry fit them right from the machines.  I've become increasingly fussy about keeping every machine in perfect alignment (and trust me this is not in my nature) and it saves so much time and frustration.

After selecting the second-best figure (I saved the best for the arms), I resaw the panels right from stock that has been made square and true from 4/4 stock.  I want to net out something above 1/4" for each panel.  You may well need all that extra thickness as qswo will warp a great deal after it is resawn.  I've found that working with stock to net two doors at a time (30" or so works best for me.)  Resaw, joiner, planer and set aside.  Joint the edges and bookmatch.

Once the glue has dried, I bring out the beast.


I bartered this from another woodworker who thought he'd use it a lot, but didn't.  All it cost me was several days of hair-raising, high-wire act ceiling installation.  Moving very slowly, with 80 grit paper, I achieve a "uniform scratch pattern."  It is amazing how quickly the finish sanding goes when you use this to true up the surface, don't skip grits, and sand two panels at a time.

Flipping to the back side, I use a 3/4" straight cutting bit to thickness the edges of the panels to 1/4" to fit in the frames.  In they go, and it's time for a quick dry-fit.  As you can see, I leave a bit of room for movement within the grooves.


 I generally stain panels before construction to avoid having white wood expose itself in the middle of winter, and as it is so humid right now, that is a necessity.

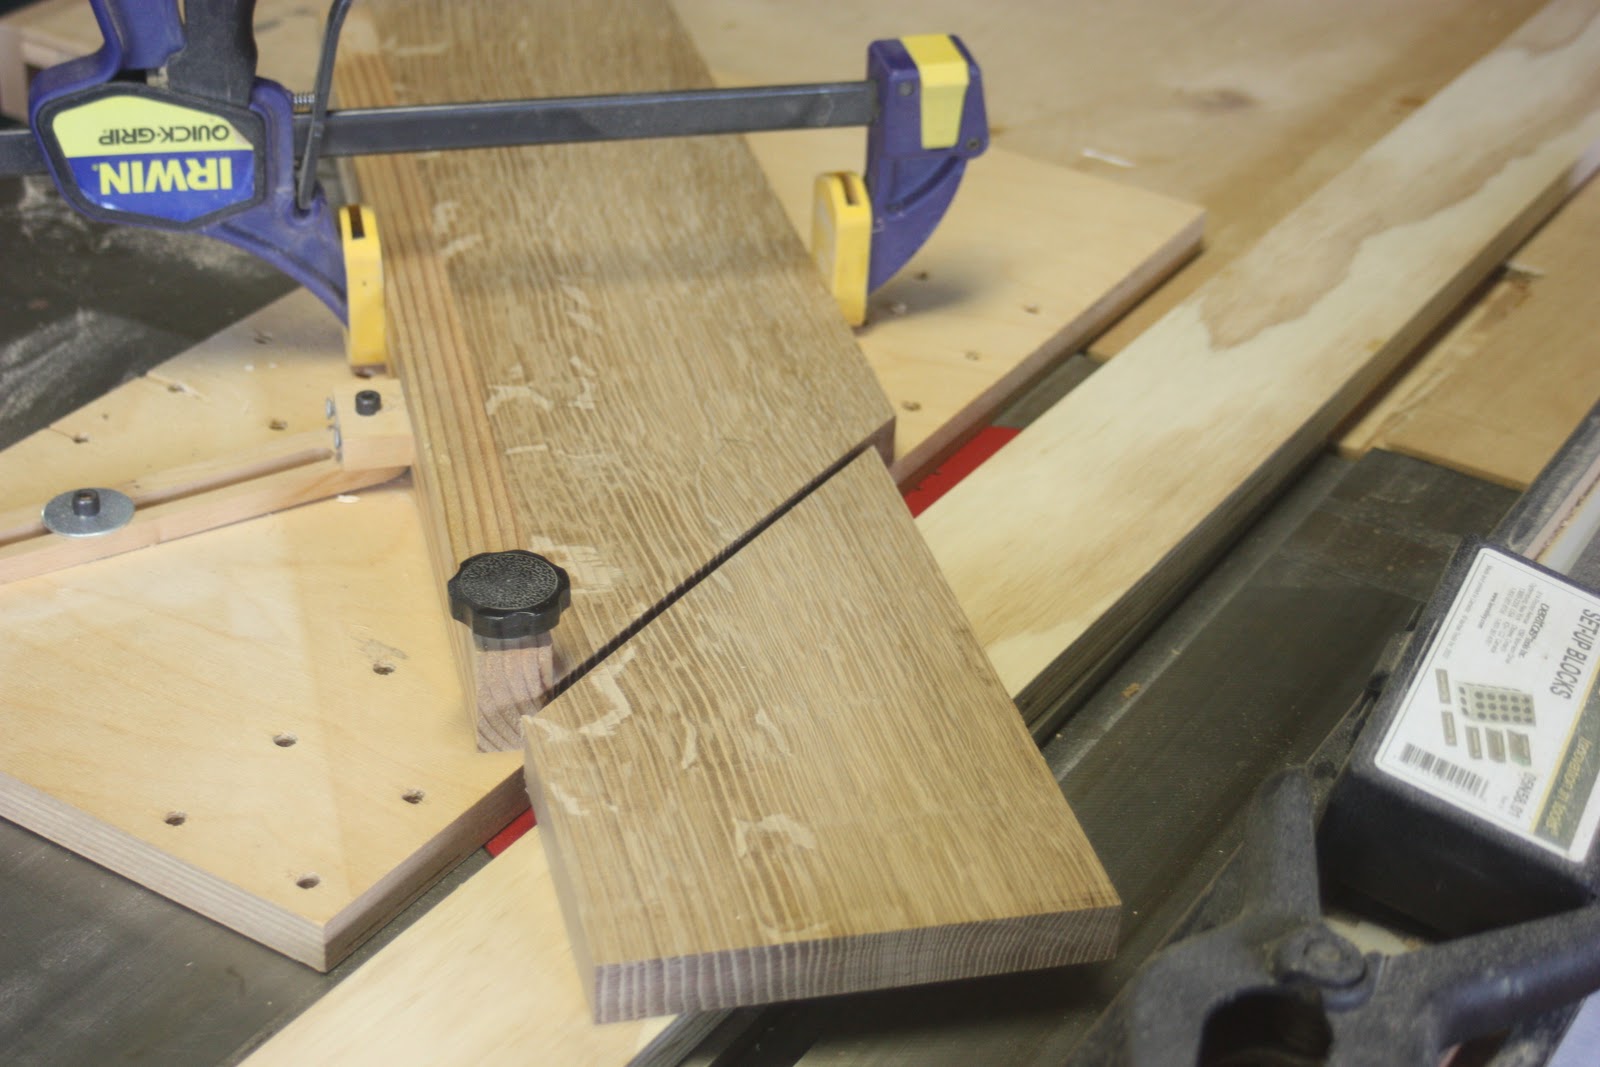
The arms on the prairie chair are very simple, but require two absolutely accurate 90 degree angles or the effect will be ruined.  Starting with straight and true stock, I put them in my tablesaw miter jig.  There's nothing too exotic here, just micro-adjustments to dial in a fit.  One key is to have a support on the right of the blade to catch the piece that falls off when the cut is complete.  Securing the workpiece to the jig with a clamp, and starting with a sharp-ish blade, also helps.  Once in place, you just need (as Julia Child says as she's about to whack a chicken into two pieces with an enormous meat cleaver) the "courage of your convictions."


My handy angle block tells me everything is cool -- but I knew this already as I had made a test cut.  Someday I will have a Lie-Nielsen No. 51 and I'll be able to fine tune this with a clearer conscience.  But I don't see that happening soon.

Now, I pretty much have all the pieces ready, and it should look like a chair within the next few days.  Cheers!

Friday, September 23, 2011

More Quadrilinear Boffinry


Well, after my long summer hiatus, the last thing I wanted to do was re-emerge with a Don Quixote-esque post about chasing the perfect quadrilinear leg post, but here goes.  As you probably know, the quadrilinear leg post is an identifying feature of high-quality arts-and-crafts furniture.  By careful construction, it allows you to create a post (in this case 2.5" by 2.5") that displays quartersawn grain on all four faces.

Every iteration of the Stickley factory has used this technique, and even low-end manufacturers tried to mimic the effect with a faux finish.  If this type of discussion floats your boat, I encourage you to check out the excellent book, Arts & Crafts Furniture: From Classic to Contemporary by Kevin Rodel and Jonathan Binzen.  It is equally appropriate in the workshop or on the coffee table.

In the past, I've used the standard whacking big locking mitre bit in the router table with less than satisfactory results.  Yes, I have a big 3 1/4 hp router and a nice Jess-Em table, but the whole process still scares the bejesuz out of me -- one slip and you've ruined a nice bit of timber.  Here's one I made earlier:


It was so good that I cut it up and used it to support a shelf.

I've also just mitered the four long edges, glued the faces, and using strapping tape, rolled it up in a bundle.  The results are nearly as good as the lock mitre bit, and slightly less nerve-wracking.  You do, however, often end up with one less-than-perfect joint.  I can hide it in construction, but I'm not happy about it.


So, with the price of  4/4 quartersawn white oak at $7.50 per bf around my neck of the woods, I decided to give modified veneering a shot.  Veneering has many things going for it.  It cuts your timber costs in half, and allows you to select some particularly tasty figure for the post you are making.  The drawback, of course, is that making your own veneer requires some (expensive) machines and can be tedious.

I started by making two 60" cores of 3/4" plywood.  As I wanted to net out around 2.5". I cut the width to about 2 5/16".  this allows me about 3/32" for the veneer on each side.  I stacked three of these core pieces of approx. 3/4" plywood to a net something less than this (plywood being less than its stated dimension.)  I would compensate for this with one slightly thicker veneer on that side.


I selected some very nice pieces of QSWO that were 2.75" by 62" -- from different boards but with similar figure.  This was facilitated by the fact that most of my stock was around 5" wide, and I needed to the leftover 2" pieces to make corbels.  I cut 1/4" veneers on the bandsaw with some great blades I recently purchased from Woodcraft Bands.  He puts together blades that resaw as well as that big name brand, but at a significant discount.  It is important that between each slice you pass the stock across the joiner to have one flat face.  When complete, you will have eight slices.

Now, I know that 1/4" stock isn't really veneer, and that it is at risk of seasonal movement.  At the heart of this method is reducing the thickness of each piece while it is attached to the core, requiring you to always have a dead flat surface to reference in the planer -- so sequencing is important.

1.  Glue up one veneer (flat side against the core) to the core with the edges of the veneer standing proud.  I do two legs at once and clamp.


2.  Once cured, run this through the planer (veneer side up) to get the veneer to about 3/16". Repeat this process on the opposite side.


3.  Now trim the overlapping veneer edges flush on the router table with a spiral flush trimming bit.

4.  Now repeat the glue up, in a similar fashion, on the remaining faces, cure and trim the edges on the table.


5. Finally, and with a great deal of attention, run the completed posts through the planer to achieve uniform thickness.

There is no doubt that this is a fiddley process, and you can argue that the money you save on stock you spend on shop time -- but I'm really happy with the results.  In addition, because there a number of steps that require cure time, you can fit it between other tasks.  The other issue is deciding how thin you dare go with the veneer, and how much you reckon QSWO is going to move.  I'm comfortable with 3/32" -- chunky enough to withstand wear, but not thick enough to overpower the glue with movement.  So, let me know what you think.  Thanks!

Next, I'll construct the Prairie Chair.

Wednesday, February 23, 2011

Building A Mt. Lebanon Side Chair: Finished and Woven


I've been dragging my feet on this project, and too much woodshedding and good times with distant friends has kept me from the shop (No complaints on either front, by the way!)  Thanks for the comments as well.  To answer James's question, all stock was kiln dried -- I'm sure that air dried stock would bend more easily.

All that remains to be done is to glue up, level the chair, apply finish, and weave the seat.  The glue up was a doddle.  I apply a bit of glue to the mortise and then I squirt some glue on a damp sponge brush to paint it on the tenons.  Insert, clamp, rest.


In a perfect world the chair would sit level right out of the clamps.  But because of a slight problem with my Side Rung Mortising Jig (the back slats were brushing against a support piece and altering the angle -- corrected by adding some height to the sliding arm.) there was a wobble of about 1/8".  Nothing to panic about.  I level the chair by placing it on a large, dead-flat surface (my tablesaw top) and identifying one of the offending legs.  It will always seem like two, and they will always be on a diagonal.  By measuring these two legs I can determine whether the issue is length (then trim the long one!) or twist.  With twist I dangle one of the "long" legs over the edge of the table -- with the others flat -- and mark the difference.  If it is slight (less than 1/16") I just trim it from that leg.  If it is more, I take about half off that leg, repeat the marking process on the diagonal leg, and remove the rest.  I think that this maintains some order in the universe.


The finish for this chair is boiled linseed oil (blo) followed by paste wax.  I like both the look and feel of a nice thin coat of wax and I'm not looking to alter the color.  As expected, it does nothing for the posts, but it really makes the figure in the curly slats pop.  I let 48 hours pass between the blo and the wax application, and let the wax sit for about three hours before I buff it out.  As long as you don't really slather on the wax you won't get into much trouble.


I defer, completely, to Kerry Pierce on the seat weaving portion of this project.  In his book, Chairmaking Simplified, he outlines a very straightforward and cost-effective way to weave the seat with rattan splint.  I purchased my splints from The Country Seat for about $10.00.  Pierce's instructions are pretty foolproof and explains everything but the tedium.  Soaking the splints helps to make them more pliable, but as they are so rough, you will be wondering at about the halfway point "Where is that blood coming from?"  Spoiler alert: it is coming from your fingers.  Oddly enough, I found this part to be the most satisfying (Not the blood part, but the weaving.)


So satisfying that I bought some extra thicknesses of basket reed with my order and fooled around making a basket.  (I know nothing about basket making, but like Manuel from Fawlty Towers, "I learned it from a book.")  I really like the strength and form you can get from weaving, and I'm wondering how I might use this in future pieces/designs.


Well, what do I think about this project?

I guess I could just say that I hated it, but that would be unfair.  Even with the back post bending omitted, it was very time consuming.  Coupling that with the fact that these chairs have a low-ish perceived value, I'd be hard-pressed to put these into the mix.  In fact, I just say an original go under the hammer for less than $300 not far from here -- one with provenance, made at the Mt. Lebanon Community!  However, now that I have the jigs, I may make more -- either as a batch of side chairs or as a single rocker.  I will say this.  Now that it is done, it is quite comfy!

Thanks for reading.  Up next is upholstery for the contemporary chairs, a prairie chair, an oak bookcase, and maybe a peek at a Butterscotch Blonde Tele I'm working on.  Thanks for reading.

Thursday, February 10, 2011

Building A Mt. Lebanon Side Chair: A Web of Intrigue


While upholstery decisions are being made on the Contemporary Chairs, I have some time to complete construction on the Mt. Lebanon Side Chair.  Up to this point it has been primarily an exercise in turning spindles and making jigs -- oh, and some steam bending.  I let the back slats and back legs cook in their forms for about two weeks and released them into the wild.  As I suspected, there was significant spring back on the legs (for the record, they stayed in the steam box for 2+ hours at a constant 200 degrees F.  They just didn't seem to want to absorb any of the water.)  A bit of research tells me that hard maple is a real bear to bend, and that there is a high failure rate.

The remaining steps were to install the back slats, glue up the front and back "ladders", make the side rungs, drill the side rung mortices, and construct the chair.

Installing the Back Slats 


Although it may be difficult to see, the front of each slat lines up with the center line of the back leg, but because they are bent they, emerge at a different angle than the rungs.  This angle will vary, and you will need to eyeball it.  Kerry Pierce, in his book Authentic Shaker Furniture, outlines a method for hand-morticing these back slats that is quite workable. 


However, as I rained blows upon it,  I thought "There must be a better way."  So I made yet another jig.  This set-up allows me to suspend a router at an approximately 30 degree angle over the leg and rout for the slat . . . and I'll write about it in more detail on Sunday.  And while the 30 degree angle is fairly arbitrary, there is plenty of flexibility in the slats and the exact angle is not critical.  Once these are complete I glued up the back ladder.


Making the Side Rungs

I spent a pleasant hour at the lathe, listening to Billy Bragg and turning the six identical side rungs.  I've really become comfortable with the wrench-as-measuring-tool approach to tenons.  I just use a 3/8 parting tool and stop removing material when the 5/8" open wrench slides over the tenon.  Because the wrench is just a hair over-sized, I take one more little shaving before I remove it from the lathe.  Once the tenons are in place I shape the subtle swell-and-taper in the rung itself.


This little stack goes to be cut-off at the new Stanley Miter box, and then I get the absolute, precise OD by driving them through my dowel plate and trimming the waste with a chisel.


Drilling the Side Rung Mortices

Using the Side Rung Mortice Jig (as described in Pierce's book, Quick and Easy Jigs and Fixtures) I went about drilling the mortices.


The whole point of this contraption is to drill the holes in such a way that you create a seat that is wider in the front than it is in the back.  The geometry is simple as you drill the same angle in both the front and back ladders -- it is just that you turn the jig 180 degrees between the two to drill obtuse angles in the back and acute angles in the front.  The master angle in this case is 10 degrees (giving you angles of 80 and 100 degrees.)  And that is the angle of the wedge you cut to position the jig.

That angle, by the way, is determined by the width of the front legs.  If you were designing your own you could cut an angle that suited your eye, install the side rungs, and then cut the front rungs to create a front ladder that fit.  In this case, Pierce has already worked this out and you just work to his specs.

After drilling holes in the back ladder you turn the jig around and drill the holes on the front ladder.  The jig adjusts to accommodate the wider front.

Assembling the Chair

The moment of truth has arrived.  All the pieces are in place and it is time to see if your patience has been rewarded. 


I start by placing the rungs in the front ladder and then slowly working this unit on to the back assembly.  In this case, it goes together fairly easily.  And I know why.

According to some builders (Kerry Pierce) perfection is not your objective, and in fact he would argue that you want there to be some deliberate misalignment.  As long as it is consistent it will add tension to the chair --like a spider's web -- and make for better construction.  I liken it to the forces within a basket that give it strength and shape.  I know that I had a couple of errors in my drilling, but this really seemed to add to, not take away from, the stability of the chair.

Now on the other side, I've read a compelling argument from Peter Galbert on his excellent blog, Chair Notes, countering this error-as-strategy approach.  If you've ever seen his outstanding work, you would be hard-pressed to oppose anything he has to say about the designing or building of chairs -- so you decide for yourself.

Next, I'll apply the finish, weave the seat and have some final words about what I really think of this project.

Thanks for reading!