

Well, many distractions have come between me and the Prairie Chair this month. And I'd be lying if I said I wasn't sick to death with the thing. Its simple lines tend to highlight any minor errors, and quartersawn white oak is rough on your tools, your lungs, and your patience. But after a few false starts it is assembled and ready for finish.

In my defense, I am in the middle of a big landscaping project that requires lots of stone wall building, stair construction, and fooling around with the tractor -- all of which I enjoy. But I'm constantly shocked by how my summer hiatus has taken a toll on my skills.
Using biscuits (both for alignment and strength) I glued up the arm assembly. The 45 degree angles were correct, so everything was square upon completion. If this is not the case, the priority is to glue this tight as any "non-squareness" will be undetectable and no dimensions depend on this being perfect. I glue and transport this on a a large piece of plywood as this is very prone to racking.

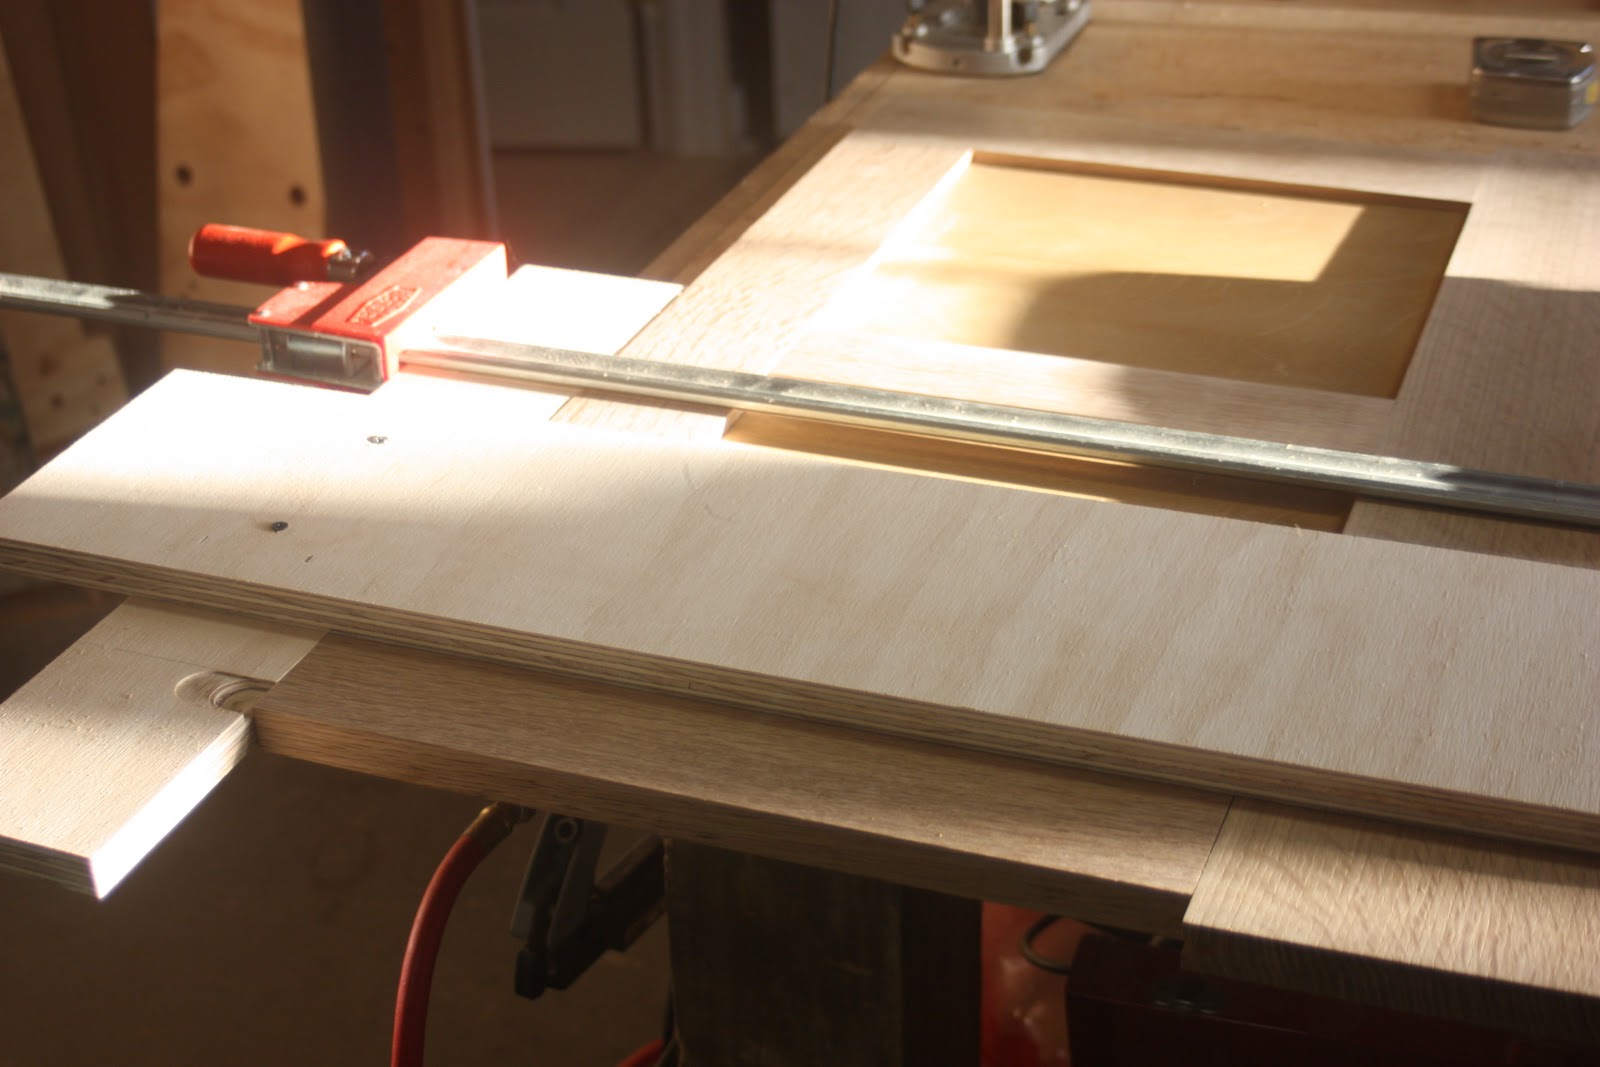
The next step is to rout the grooves in the legs -- some grooves for the decorative corbels (1/2" deep), some for the side and back panels (3/4" deep.) Cutting these grooves on the router table is machine woodworking at its worst. I find that if I use the 1" ring with the 1/2" spiral bit, and collect dust from underneath, it helps a bit. This has convinced me that (among other things) I need to invest in a good respirator.
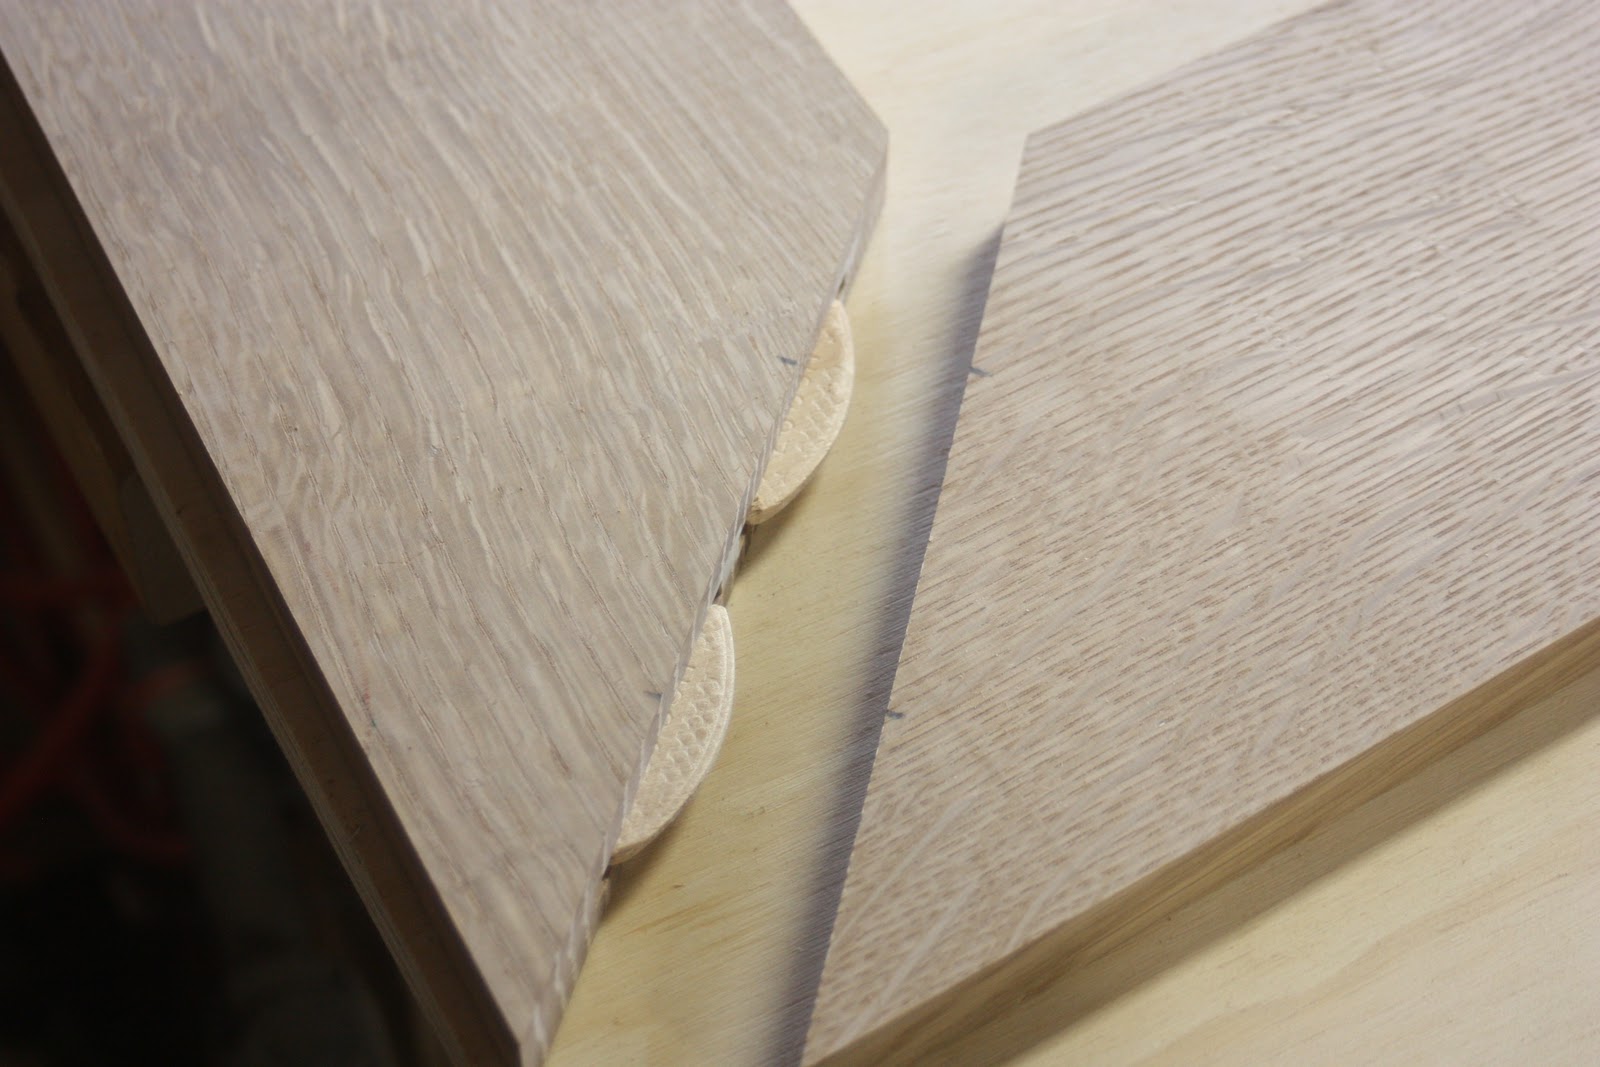
Routing the corresponding tenons in the panels, in a dead straight manner, is critical to the fit of the chair and is where big mistakes can be made. In this case, my inattentiveness resulted in one side panel that was out of square by about 1/8". It is amazing how a small error magnifies over the length of one of these large panels.
I fix this by squaring each side with either the top or the bottom. If you square one to the top and one to the bottom, you will end up with a parallelogram. Also, you need to complete the out-of-whack panel first, as it will reduce it in size by the amount that it is off. I use a dead-straight guide on which I can run the router on either side, squaring it (in this case) with the top rail. This squares the exposed bit of the panel, and makes the tenon slightly askew -- which can be be trimmed. I use a 1" straight cutting bit and set it to the depth of the previously completed corbel tenons. Now use this corrected panel to set the dimensions on the opposite panel.

The back bottom rail and the front rail have tenons that are a full 1 1/2" deep for stability. I cut these after the main grooves are cut with a plunge router.
With these long grooves and when using white oak, I've found that tenons cut to the exact width may need a couple of passes with a rabbet plane to slide into place -- which is fine. A dry fit shows that things are now square and final sanding (which is not worth blogging about!) can take place. All that's left to do is glue, finish, and haggle with the upholsterer.
So, what's the advice to myself?
1. Perfect sub-assemblies increase your chances for a perfect final product
There are too many moving parts and not enough reference points to ensure that each panel hits its marks in one glue up. I should have glued up the top rail and side stiles with the panel in place, let that dry, and then slid it in place on the bottom rail.
2. Tenons should fit under the pressure of your hands, not a mallet
On the panel that was out of square, it seized up because things were too tight. Adjustment were impossible when the application of glue swelled the joints.
3. I've got to get a handle on the dust situation
I'll always be a hybrid woodworker, and my current Delta 1.5 hp system is not cutting it for sanding and routing. I'm actually thinking about going the Festool Rotex 150 route with their mid-sized dust extractor unit.
4. Square and true don't just happen by eye -- no matter how cocky you feel
5. Never rush a project to get out a blog post
I'm happy to have this in the rear window as I have two projects lined up that should be fun. The first is a tiger sycamore tele guitar that I'm building from scratch (I've assembled a kit before), and an original design for a table that is loosely based on my love for Westminster Hall's hammer beam construction.
Cheers.

I really like your chair. I'd like to make one like that some day.
ReplyDelete"Never rush a project to get out a blog post." Who would do that? :)
And let me know if you find a respirator you are pleased with. I am still looking.
I seem to always be saying, "I'm going to completely rework my methods to accomplish X" and the dust thing is my current lament. I should probably get a big Trend Airshield that I can use at the lathe -- or get a 3hp extractor, or go Festool on the really dusty things. In reality, all three would suit me, but not my budget!
ReplyDeleteI like your creativity. so much work i think youve put to that right?
ReplyDelete__________________________
Upholstery and Vancouver Upholstery
I like your post
ReplyDelete