Monday, November 30, 2009

Craft In America

If you haven't had a chance to see the recent PBS series Craft In America, it is well worth your time to check out the full episodes that are available online and the snippets that give some insight into the artists' point of view.  Without pushing the metaphor too far, the production values and the thoughtful approach make the program itself a work of art.

Throughout this past week my wife and I have been out and about trying to avoid the depressing scenario that is the holiday shopping season.  With no real agenda we seemed to find ourselves in a number of artisan studios -- not really shopping, just taking in the vibe. During a trip to Lititz, PA we visited Morton Fine Furniture where in a storefront setting a craftsman did his thing.  The shop reflected the tastes of a craftsman and the savvy of someone who knew what would sell.  On the way home we stopped at the quiet and comfortable studio shop of Eldreth Pottery, where Santas from a number of years lined up like American Santons looking across the Atlantic.

In our little corner of Southern Chester County, PA there is an artisan community struggling to break out.  The recent creation of the Oxford Arts Alliance has brought a breath of fresh air to this area.  And by surprise we stumbled across an open studio day sponsored by a different group that featured a fantastic glass artist, Nine Iron Studios and a truly unique clay monoprint artist, Mitch Lyons.

Each artist had connections outside our little community (New York, Murano) and each had a slightly bittersweet view of their work, "I love what I do, but it's hard selling art to farmers."  But like those featured in Craft in America, each cared deeply about every piece he or she created and the process by which a work of art emerged.

I have to say that I felt much less cynical about the whole gift-giving thing after meeting these artisans and I know we'll be spending some time making a couple of thoughtful purchases from their studios.  Which doesn't feel at all like a favor to them, but like an indulgent gift to ourselves and friends.

Saturday, November 28, 2009

The Prairie Chair -- The Plan Comes Together


After messing about with the leg joinery, It was time to bring Woody in to help with the glue up. ( I find it particularly helpful to have a rambunctious Labrador underfoot as you start the most stressful part of a project!)  Once the leg assemblies were dry it was time to put the grooves in place to hold the panels and the corbels.  In this case, the corbels are more than decorative items as they provide a significant amount of support for the large arms that give this piece its prairie look.


I glued up two sides, let it dry overnight, double-checking that they were the same length and that there was a 90 degree angle between the panels and the legs.  The front and back followed, with the corbels coming last.  It is important to make sure that the corbels are dead flush with the top of the legs to provide maximum support for the arms.


I decided to affix the arms to the top with a series of dowels.  The width of each arm is just enough to cause concern about wood movement, so the dowels run on one line down the middle -- the sides of each arm are free to move side to side.  After dry-fitting several times, I drilled holes down the back panel first and placed dowel centers in the holes.  Once I was sure that the back arm was in the correct place, I pushed it down and made the marks on the bottom of the back arm.  I then drilled these holes inserted the dowels and put it together -- DRY.   This allows you to drill the holes on the side panels, insert the dowel centers, and position the arm precisely against the back arm before you push it together to make your marks.


Once both arms are ready you take the arms apart, insert dowels with glue in all the panels, and beginning with the arm on the left, assemble each arm in succession.  I added a #20 biscuit on the mitered edge with a drop of glue to help ensure that the edges stayed aligned.

The Lee Valley 1/4" dowels are designed to start to swell almost immediately after the glue is applied, so it glued up nice and tight.  I decided not to clamp; it didn't really need it and I didn't want to introduce any unnecessary stress.


So far, so good.

Monday, November 23, 2009

The Prairie Chair -- Quadralinear Quandries


Tom Watson, the great golfer, once said that the difference between a professional and an amateur was that an amateur attempted a shot that he could pull off three out of ten times, while a pro only tried one he could make nine out of ten times.  I think some of this logic applies to furniture making as well.

The quadralinear leg -- one that displays four sides of quartersawn figure, is a hallmark of refined arts and crafts furniture.  A quick browse through the Stickley catalog will not only show you many examples, but even feature a blurb about their pride in this technique.  In order to create this effect you must work through some complicated joinery -- joinery that has the potential to cost you a two-stroke penalty (forcing the golf metaphor) in the blink of an eye.

Sure, you could mill a big chunk of 12/4 oak for your legs, but you would have quartersawn figure on only two legs.  You could also add quartersawn veneer to the plain figure sides, (a technique in a recent Fine Woodworking video) but history and Robert Lang says that it will split, and your furniture will be flawed.  The answer seems to lie in mitering four long pieces of quartersawn oak to create a quadralinear leg.

I decided to test three methods, all of which can be found on various sites, to see which one results in the highest percentage of success without making you lose your sanity.  Just to lay the groundwork, all pieces are 2 1/2" wide and 13/16" thick. 

The Drawer Lock Miter Bit Method


This has been my method in the past.  If you are willing to pony up 75 bucks for a bit and you have a fairly robust router, a router table with infinite adjustment capabilities, and the patience of a saint, this might be your first choice.  By running one edge of your leg piece on its side, and then the other side flat on the table, you will have a joint that has a 45 degree miter on the outside and some internals that lock it together with its mating piece.

All this works in theory, but in practice I've found it to be highly unsatisfactory.  There are just too many variables -- the height of the bit, the distance of the fence, the speed of the router (I've tried everything from 13,000 to 18,000 rpm), and grain direction.  I've used featherboards, I've trimmed of edges on the tablesaw, I've handplaned the flats, and everytime I do it I feel that the results are in the laps of the woodworking gods and require some large amount of jiggery-pokery to get a result. Sometimes it is dead perfect; sometimes it is not.  Also, no matter how you try to collect the dust, your shop looks like the Sahara Desert in a heartbeat.

If you approach your furniture building like an accountant, this might be for you, but I doubt it.  There must be a better way.

The Tablesaw Miter Joint


Robert Lang does an excellent job of explaining this method in his second collection of More Shop Drawings for Craftsman Furniture.  This joint looks most like what I believe the early factory furniture makers used and it has a lot going for it.  It feels authentic and once you work out your chosen dimensions, you can put together a detailed plan that allows you to cut from start to finish with no guesswork.

But . . . quartersawn white oak is by nature fairly reactive wood, and as you cut it, it will bend and twist a bit rendering the internal joint faces inaccurate.  You then must add a little play in order to make the money faces (the miters themselves) fit without gaps.  Also, the required cuts force me into positions I try to avoid when using a table saw.  There are times when you are referencing knife edge cuts awkwardly and even though I use push sticks and featherboards, I started to get the heebie-jeebies.

The results are better than with the router table, but it wasn't a silver bullet.  I got to thinking, the only thing that really matters are the miters themselves -- the internal joint stuff is only there to hold it in place while you clamp it up.  If you can find a way to clamp it accurately, then all you need are four mitered pieces, right?

Four Mitered Pieces


To quote Walter Sobchak from The Big Lebowski, "The beauty of this plan is in its simplicity."  If you start with 2 1/2" wide stock, set your fence to 46 mm (if you have a Beisemeyer fence it is the most accurate mark), and adjust the blade to 45 degrees, you can cut miters on both sides of the piece.  You are now done with the machining.

Now, here's the trick.  Set the pieces side-by-side, edges touching and apply long strips of packing tape. 


Now flip the bundle over and apply glue to the faces.


Now roll up and apply a couple of quick clamps where necessary.


There is plenty of glue surface and you are free to insert a square block in the middle if you want to add stability.  I don't think that it is necessary since any stress on the piece would be the tenon pushing on end grain.  The method is quicker, kicks up less dust, and is safer than most others. The tape provides much more pressure than you would expect and the glue line is as small as on a perfectly executed Drawer-Lock Miter.  The difference is that it is perfect nine out of ten times, not three out of ten.  I like it a lot, and I'm going to retire my old technique.  But enough about method.

I've glued up the panels to the chair and placed the grooves in the sides of the completed legs to hold the corbels and the panels.


 The dry fit looks something like this.


Next, assembly and finish.

Thursday, November 19, 2009

New Woodwork Magazine


Hey, let me say that I'm not a shill for these guys, but I just received the new "annual"  Woodwork Magazine and I really enjoyed it.  I was pretty bummed out when they announced that they were ceasing publication, (and then added insult to injury by trying to fob off the dreary American Woodworker in its place) and I've since been amassing back issues from eBay and the like.

What makes it a great complement to Fine Woodworking and Popular Woodworking are the features on really interesting craftspeople and their push-the-envelope creations.  The woodworkers I most admire are the "Mad Monks" who crawl into their sheds, carve spoons for twenty years, live on a diet of porridge and PBR, and emerge with a totally new paradigm.  When the revolution is over, and I'm declared King, these folks will help me run the world.

This new issue doesn't disappoint and I read the whole mag in one sitting.  There's some promise that if there is enough interest they will move to a more frequent publication schedule.  I'd love it if they considered being a quarterly e-zine, but as said revolution hasn't happened yet, we can only support them and hope they grow.

Wednesday, November 18, 2009

A Prairie Chair By the Numbers


Arts and Crafts furniture, particularly the kind still produced by the Stickley Company, was the first genre that made me take notice and begin to think of furniture as an expression of my own tastes.  College furniture just needed to be strong and not smell (too) awful.  Newly-married furniture needed to fill space.  But as my wife and I began to look past pure function, we found ourselves travelling long distances to actually visit the elite showrooms deemed worthy of carrying the Stickley line.

It was much later that I discovered that they are just the most well-known of the many companies and individuals who keep the craftsman spirit alive by producing pieces that aesthetically and physically stand the test of time.  (Kevin Rodel and Jonathan Binzen's book, Arts & Crafts Furniture is a great history of the movement, and should be part of every furnituremaker's library.)  I've decided to make the Prairie Chair for myself, and I turned to Robert Lang's book, Shop Drawings for Craftsman Furniture for inspiration.

When this book is mentioned you will, without a doubt, get one or both of these reactions -- "What a great book." and/or "Beware of the errors in the measurements.  I would echo these sentiments.  The description of Stickley techniques, the selection of the projects, and the diagrams are all superb.  I did find a couple of errors in the measurements, but caught them before they cost me any time.  We're all adults here and we should be checking these dimensions anyway, so I'm not too bothered.

This project consists of creating two frame and panel sides, one frame and panel back, four posts, arms and decorative corbels.  The biggest challenges look to be keeping the balky quartersawn white oak square and true, double-checking the dimensions, and tackling the dreaded quadralinear leg details.  I started by milling the necessary stock to 13/16 and creating the mortise and tenons for the sides and back:


I did all of the tenons on the tablesaw with a sled (slightly oversized) and brought them to final size with a rabbet plane.  The mortices are all grooves and I machined these on the table saw as well.  Here's the irony: the arts and crafts movement is often described as a desire to bring humanity back to the trades, yet this entire piece is best suited to industrial production.  So it goes.

I also resawed the panels for the sides and back, bookmatching them for effect.  True to form, the resawn QSWO cupped something fierce, so I'll have to rely on the sturdy rails and stiles to hold it in place.  Before glue-up I pre stained the panels.


Next, I'll look into the finish and tackle the quadralinear legs.

Sunday, November 15, 2009

A Disston and A Dat One


William Morris famously advised that you should "Have nothing in your house that you do not believe to be beautiful or know to be useful."  But a different standard has to apply in the workshop.  Sure, I know that there are those who collect idle Stanley 45's, perched on upper shelves like some industrial gargoyles, but shop space is too precious for mere ornamentation.

And yet . . . once in a while you see a tool that is so visually appealing that you are compelled to make it useful -- function following the love of form.  For me, that tool is the Disston hand saw.

I have an appalling record with large hand saws.  They have all been cheap, mass-produced items that are destined to die a rusty death-by-exposure somewhere in my back yard.  And, like a fire extinguisher, when called upon to work they double-cross and leave me humiliated.  Avoiding hand saws is why we buy table saws, right?  However, when I purchased four circa 1900 Disston's from different people over the course of a week I knew that I had to transform the simply beautiful to the proven useful.

So, in Mythbusters style, I set out to test whether someone with no previous sawsharpening skills could turn two neglected saws (one cross-cut, one rip) into shop workhorses.  The first place to turn was http://www.vintagesaws.com/ . The site is not only a treasure trove of beautiful saws from the past, an online store for Disstons resurrected and ready for service, but a source for straightforward insructions for setting and sharpening saws.  As these instructions are so well-written, I won't go into detail on how I proceeded, I'll just explain how I fared with the online tutorial.

There are several steps to successful saw sharpening:  jointing, shaping, setting, and filing.  In order to complete these steps you will need a saw vise, a saw set, and a file.  The first two items are readily available on eBay or from a number of online antique tool dealers, the files should be purchased from the site itself (it's the least you can do to say thanks for the good info.)  The tutorial is in the Library section of the site.

My saws were quite dull but they were not "out of joint" so just a few passes with a stinking bastard file put little flat spots on the tops of the teeth. Nor were they in need of re-setting (I determined this by sawing and finding that they did not bind in the cut.)  So the main focus was on shaping and filing.  The site describes the differing geometry of cross-cut and rip teeth, and gives you instructions on how to make alignment jigs to help with accuracy.  The process is fairly intuitive and as long as your eyesight holds out you will begin to get in a groove.  I must say that the sight of gleaming sharp edges emerging from 100 year old steel is pretty encouraging.


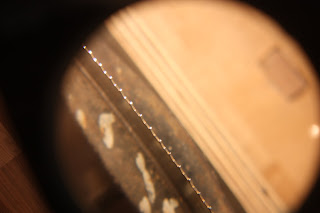
From start to finish the process took me about 60 minutes per saw.  This includes lots of stopping and checking directions and peering through my magnifying light


As I don't know what perfection looks like, I aimed for consistency.  The art of filing is the ability to manuever the file -- biasing it in a way that wears away steel to leave a tooth that is symmetrical and sharp.  Maintaining the proper rake angle, and the different fleam angles for the cross-cut and rip saws is easy to understand, slightly more difficult to acheive.  It is a bit like the difference between understanding a new guitar chord and playing it fluidly.  By following the tutorial I finished and inspected the work.  I did suffer a bit from the "Big Tooth, Little Tooth" syndrome, but overall it wasn't too shabby.


The first thing you notice, when you take a newly sharpened saw to 4/4 quartersawn white oak, is the sound -- it positively roared when it started cutting.  Pull it back, let it drop, and listen.  Each pass took whacking big cuts that were straight and effortless.  Here's the best part:  in spite of my errors, lack of experience, and general ham-fistedness, this crosscut saw went like the clappers on my first try.  A twenty dollar saw, a six dollar file and an hour of my time, resulted in a woodworking Pygmalion; the sow's ear transformed.


I had similar results with the rip saw, as I dug into the cut list for an upcoming project.  I did find that the rip saw cut rougher, and was harder to start than its cousin, but that may just be the nature of the beast.


I have two more saws to sharpen and I know that I will get better as I gain more experience.  The bottom line is that you can do this, the margin of error is quite wide, and that the end result is both aesthetically and practically pleasing. 

Next week I leave this toolfoolery behind and begin construction of an iconic piece of American furniture -- the prarie-style side chair.  Be seeing you.

Thursday, November 12, 2009

Norm Abram Exposed . . . As a Really Nice Guy!

I spent a good part of my working life playing at a local PBS station.  And in addition to wearing an Arthur costume and memorizing the plots to every Are You Being Served episode, one of the great pleasures of the work was getting to know the icons that had such a big influence on the thinking public-- and among that pantheon was Norm Abram.  When I heard that he was wrapping up the show it reminded me of a weekend nearly twenty years ago.

Norm's spinoff show, The New Yankee Workshop, had recently hit the airwaves in the wake of the continued success of This Old House (sort of like when The Jeffersons spun off All in the Family.)  Norm was promoting the program at a local consumer home show through the auspices of our local station.  The place was packed and time was tight.

Norm arrived without a care in the world.  And while there was a specific timetable for breaks and down time, he ignored it and spent many hours talking one-on-one with the general public (sort of like how I expect he would dig into the cutlist of a cherry armoire.)  It takes real skill to answer the question "How many flannel shirts do you own?" for the fifteenth time and make it seem like the first.  Every block of wood was signed, every awkward shop-made tool was inspected, every photo was posed for with the same enthusiasm.  And though This Old House was going through an acrimonious break up with its main presenter (he whose name shall not be spoken), Norm refused to say a single negative thing about the situation.  Instead, he spoke about the need to get on the treadmill more often.

Two funny things about the audience data at the time:  Ninety-some percent of the viewers of The New Yankee Workshop never picked up a tool.  They watched because somehow, deep inside, even just watching someone complete a piece of furniture brought about a sense of well-being.  No surprises there.  And while men over fifty was the largest audience segment, it was only slightly larger than the number of children under five.   More kids watched The New Yankee Workshop than Mister Rogers Neighborhood! Because like Fred Rogers (an amazing human being) Norm was a sincere person talking directly to the camera about something for which he had great passion.

The New Yankee Workshop would go on to air for many more years.  Norm's no-nonsense delivery, seemingly unlimited stable of power tools, and love of dark Minwax finishes, would become the thing of woodworking legend.   And like my other public broadcasting heroes, Julia Child, Bill Moyers and Fred Rogers, he never flew the PBS coop for some other more lucrative deal.  Twenty-one years without a whiff of controversy or discord.  That's pretty cool.  As the program winds down, I've heard some say that Norm is going back to being just a regular guy, but the way I see it, he never stopped being one.

Tuesday, November 10, 2009

Bon Voyage, Gilberte

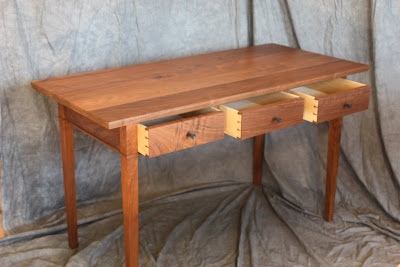
Well, I promised that I would have the Gilberte desk finished this week, and through some odd alignment of the planets, she is complete! 


With the drawers and base completed, and the top glued up and ready, all that was left was to decide on an edge trim, finish the top, and fiddle with assembly.  I wanted the edge trim to complement the simple lines of the piece, and as the top itself was large (23"x 54"), any routered edge would have to be done with a hand held router and take into consideration that I would be dealing with end grain.

I cut the ends and finished them with a low angle jack and hoiked the top on the tablesaw to make the two long sides parallel.  I decided that a wide cove on the bottom of the edge, with a 3/8" fillet on the top would be nice, but I don't have a set of hollows and rounds (yet) so I thought I'd cut a 10 degree chamfer on the bottom edge, leaving a 3/8" fillet on the top, on the tablesaw.  And for a brief moment I began to hate the project.

Why?  Because I'd somehow moved from crafting a piece of furniture to machining a piece of furniture -- two totally different things.  I slowly lowered the top and stepped away from the machine.  Minutes later I had constructed this haphazard board jack and I was on my way.


It took all of 30 minutes to hand plane subtle and accurate bevels on all four edges.  It looked good and I felt much better.  I chose to attach the top with the tried-and-true-wood-buttons-in-slots-method I normally use on table tops. 


The finish was two coats of dye with three coats of poly, all hand applied with a bit of rubbing down with a synthetic pad between coats.  I think it has a nice in-the-wood look.


What would I change?  I definitely found that the possesion of, and expertise with, hollows and rounds would have allowed me to do a more subtle edge treatment.  I am always working to refine my internal carcase work with regard to drawer infrastructure, and I think one more groove in the web frame would allow me to inset the drawer guides without fasteners.  As it wasn't a cross grain situation, I used inset brass screws.  I also think that this is about as large as I want to go without stretchers for the legs.

On the plus side I want to mess about with a gallery, a fancy burled walnut/black leather blotter for future desks, as well as entertain the idea of a burled walnut veneer top with attached edge treatment to add interest and eliminate end grain.  So, a few pictures before it leaves for its final home:


Any questions?  Any answers?

Sunday, November 8, 2009

All I know is, I call it The Stig*

I ordered the Hock 2 5/8" blade from http://www.craftsmanstudio.com/ on Sunday, and it arrived on Tuesday.  Short of placing it in Superman's back pocket and pointing eastward, I'm not sure how it arrived from California in two days.  What great service.

Sod's law dictated that the Hock blade would be slightly thinner than the L-N that I used for a test, and so I needed to make a new wedge.  The perfection of the first wedge was just dumb luck, but after a couple of tries the new article was in place.  I found that the geometry of a scraper is like a surreal bevel-down plane.  It wasn't important that the wedge hovered right above the edge, but it does need to be curved to keep the shavings (yes shavings, not dust), from gumming up the works.  Most important, it needs to bed the blade perfectly against the infill of the plane.


Ejler explains that the blade should have a standard 25 degree bevel and then a 45-50 degree secondary bevel to follow.  I use the word secondary instead of micro since I made this a full 1/16" wide.  I tried the plane both with and without a hook.  The hook works better.  I won't go into a long-winded description of how to form a hook, since a google search will give a million options.  I will say that my own scraper sharpening antics became a lot more purposeful when I used a burnisher instead of a jig and kept the pressure light -- just the weight of my hands holding the tool resting on the edge.


With no more fuss I set the scraper on a flat piece of mdf, dropped the blade in behind the post, and seated the wedge with a light tap.  It worked a treat.  Given the width of the blade it had a large surface area upon which to reference, and it immediately produced thin wisps -- revealing the previously unseen ripples that come off a board right out of the thickness planer.  I played around -- advancing the blade until I got tool chatter, skewing, squeezing my hands, loads of pressure, no pressure -- and it displayed that thing we look for in all our hand tools: personality.


And like all good tools, it also has spawned a desire for . . . wait for it . . .  more tools!  I think I'll make one  to hold a toothing blade for gnarly woods and veneering, and I really need to make an artful plane hammer for the many little taps I hope to make on The Stig over the years.

* All apologies to Jeremy, James, Richard and the entire crew of Top Gear.

Thursday, November 5, 2009

Glue-Ups are a Zen Process, But Hogan, We Have Rules in this Camp!

Top glue-ups are always the hairiest part of any project I do.  This is particularly maddening since the degree of difficulty is pretty low on any of the three or four operations I need to perform, but get one wrong and I'm up for hours of hair-pulling.  So, as I start the assembly of Gilberte's top, I keep a few of my own rules in mind:


Start Thick
5/4" stock is only marginally more expensive than 4/4" and it gives me more room to play.  Unless I really want a dead-on 3/4" top (In which case go for the 4/4" as I don't want to awaken the internal stress monsters by removing massive amounts of stock) I let the exact thickness be determined by the way the wood is working. 

Start Long
I bring at least 12" extra to the altar of the snipe gods for every table top I pass through the thickness planer.  Someday I'll figure out the exact combination of roller height, pressure bar tension and outfeed support that ensures, every time, that there will be no snipe.  Until that day arrives, I'm happy to add an extra bit of waste into the equation.


Square and True Makes for Happy Woodworking
Any novice woodworker knows this, yet I have to constantly remind myself not to fall asleep at the switch on this first step.  This isn't jazz, its woodworking,  No exceptions.

Have A Bailout Plan
As a hybrid power/hand tool guy I have number of options available.  A friend of mine once took glider plane lessons.  Throughout take-off the instructor kept asking "What do you do if the rope breaks now?  How about now?"  I ask myself the same questions throughout the process and when things start to go pear-shaped in the surfacing process, I cycle through the higher angle/ lower angle, scraper, thickness planer, sander options (in that order.)  It is for this reason that I do a number of "sub glue-ups" all less than 15" in width, and keep the planer idling in the background.  I also work hard to make the aesthetics work within a framework where the grain is running in the same direction in all boards


There's No Crying In Woodworking
As that great philosopher Casey Kasem said, "Keep your feet on the ground but keep reaching for the stars."  I make each step the best I can do.  I have never cut the absolutely perfect dovetail or planed a dead-flat surface.  Success is always relative to your own tolerances.  This is why Anant and Karl Holtey can both stay in business.  Above all "Be happy in your work."


I've also applied the dye to the carcase and fine-tuned the drawer fit.  Things are humming, and I hope to be done with this within the week.

Tuesday, November 3, 2009

I'm Not the Scraper Maker, I'm the Scraper Maker's Son. . .

As a rule, I leave tool making to the professionals. 

Like its cousin jig-making, tool-making requires a dogged focus on performance, but with the added pressure to make it look nice.  The jigs in my shop resemble modern art -- found objects that work only when used in a completely non-intuitive fashion.  They are like some sort of lethal puzzle jug, except that instead of getting wet, you lose a finger.

So imagine my surprise when quite out-of-the blue I decided to make a scraper plane.  It's not that surprising, actually, since I do have a desk top to finish.  But Woodwork magazine came to my rescue with just the right article.


Ejler Hjorth-Westh wins the award not only for the best plane article, but for the best name, and the best hair of the June 1995 issue.  His plane consists of six pieces - two cheeks, two infill blocks, one wedge, and one pin.  The only critical angle is the "ramp" upon which the blade rests.  In this case he recommends an angle of 95 degrees.  He also suggests that you use an angle of 50 degrees on the front ramp -- and leave plenty of space for shaving clearance.


I had a block of hard maple that I  fashioned into the infill blocks.  The blocks are 2 1/2" high by 2 7/8" wide.  The width is determined by adding 1/8" to the width of the blade you will use.  The cheeks are some 1/2" QSWO I had left over and the wedge and pin are also oak.


Once these have been cut to a rough form, it is time to mark and drill the hole through the cheeks to hold the pin.  While he suggests filing the posts of the pin, I actually turned each pin to 3/8".  I first gripped a 3/4" block of oak in the little jaws of my chuck, held it between centers, turned one pin, then flipped it around and held the completed pin in a keyless chuck and turned the other end (again between centers.)  I rounded, slightly, the edges away from the ramp and tested the fit.

Ejler suggests making two 1/8" registration holes on the cheeks, with matching holes in the inserts (above the dotted line arc) that will allow you to insert a dowel to keep the parts lined up during construction.  As you will be cutting away this portion to give the plane a sleek look, they will not be seen in the finished item.  It is good practice.  So I chose to ignore it and proceed with the glue up (remembering to capture the pins between the cheeks.)

Upon unclamping I found that one cheek had shifted up by about 1/32" , but one "death-or-glory" pass over the jointer set things to right.  My advice -- use the registration dowels. 

I always save any curve I fair in mdf for a router template as they come in handy for drawing arcs in situations like this.  I found one, drew it, and sent the plane through the bandsaw.


Tradition would dictate that you use the scrap from the infill to make the wedge.  I, however, used a scrap of the QSWO cheek, shimmed it by 1/4", turned it on its side, and passed it through the bandsaw.  The photo of this procedure looks so dangerous that I refuse to post it.  It would be more sensible to use a handplane or start with a longer piece, shim it on a sled, and pass it through the thickness planer.


I must admit that this was a charmed project -- everything went right.  All the pieces fit on the first try, the bandsaw cut a perfect arc in the final shaping, and sanding took about five minutes down to 400 grit.  This, of course, ensures that it will not work.  I'll wait until the Hock blade arrives to give a final update. 

This won't be the last plane I build.  There is something very satisfying about completing something in just a few hours.  I'm also chuffed about the way it looks; it reminds me a bit of an old Kharmann Ghia I once owned.  Let's just hope the doors don't fall off this one.


Sunday, November 1, 2009

The Unbearable Lightness of Being in New Studio Space with Gilberte

There’s nothing like a change in venue to get the old creative juices flowing.

Everything came to a screeching halt as I spent three weeks finishing the studio portion of the shop. I now have a fairly utilitarian machine room where I can kick up as much dust as I want, and a more contemplative studio where I can work with hand tools and focus on design. With normal service resumed, I’m looking to complete the Gilberte desk.

The idea is to use this design as a “master recipe” (a la Julia Child) on which to base future contemporary writing desks. I’ll spare you the blow-by-blow of its rudimentary construction details. The legs are tapered on all sides, it has three drawers with turned pulls, and my objective is to use a very small number of design elements to make it unique. In this case, I’m hoping that the curly drawer front on the left drawer, the inset molding, and the edge detail of the top (yet to be determined) is enough to carry the day.


I hand cut the dovetails in thicker-than usual drawer fronts and I’ve picked up that design in the ebonized cherry pulls. I also decided to pre-stain the drawer fronts so that the dovetails will pop. 

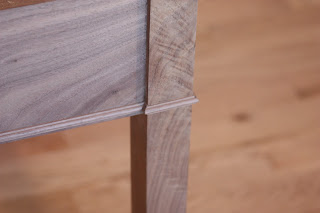
I want to continue to develop this molding technique in future pieces – rout the groove and machine the molding. It’s chunky, easy to make, and it ensures that it won’t be the weak link in the construction chain.


The legs have a good bit of figure -- ironic since I cut them from some ratty 8/4 common.  The finish is Walnut Transtint mixed to some now-forgotten ratio and several coats of poly.

I’ve toyed with a number of options for the top. I have a whacking big slab I found in the odds-and-sods room at Groff’s, but it is too heavy for this piece.  I suspect that I will use some 5/4 that I have lying around and then tackle the edge treatment as it goes together.  Hhhmmm . . . if I only had that scraper plane I've been thinking about.