Monday, January 23, 2012

Building A Lutyens Garden Bench -- The Base Comes Together


So far, the most difficult part of the project has been the sheer size and weight of the stock.  Here in Chester County, PA I have ready access to 8 inch wide, 12 foot long, 8/4 white oak.  But hauling it around the shop, cutting it to the proper dimensions, and surfacing it becomes a big issue.  In order to save my back I cut each piece to +/- 6 inches (to allow for snipe) of its final length.  I don't even think about using the table saw to cut to width because of the extreme internal movement of flat-sawn white oak.  In fact, it wants to twist so much during sawing that even the band saw is out of the question.  Out comes the rip saw and wedges, and once chilly shop seems a bit steamy.


I cut this about 1/4" oversize, let it sit for a couple of days and pass one edge and one face on the jointer, then use the thickness planer to reach my final width and thickness.

The Back Legs
The most complicated element of the base is the back leg segment.  In order to achieve the necessary heft, you must face glue two, 3 1/2" by 2" pieces of stock and band saw out the rough profile.  I entertained notions of using two pieces of stock and fashioning some fancy scarf joint, but this bout of insanity passed and I went with the most straight-forward approach.  The key is position your template so that you hide the glue line on the lower half of the leg.

 I trace the template and rough cut each leg on the band saw.  Outside faces are smoothed easily with a hand plane.


The inside faces are worked first with the hand plane, then a spoke shave, then a quick pass on the spindle sander at the interior angle.  Once the two pieces match I use the template to cut them to length with each end sporting the proper angle.

Rails and Stiles
Like it or not, the next part of the project enters into the realm of chair making -- and I always find this both fascinating and slightly complicated.  I like making chairs, and it is not really difficult if you can keep all of the angles straight in your head and remain mindful of the forces at work.  While I won't attempt to give a step-by-step tutorial, it is easy to keep some general notions in mind:

Looking at a side view, all rails join the front leg at a 90 degree angle.  They join the angled back leg at matching obtuse/acute angles depending on whether they meet above or below the back leg bend.

The dry fit looks good, the gaps are because I have it pulled slightly apart.

Looking at a front view, all rails join at a 90 degree angle (there is no "splay") and follow the lines of the leg to which it connects.  This means that they are 90 degrees to the ground in the front, and angled along the same lines on the back.

Joinery
All joinery is done with loose tenons.  Mortices that are on the faces of boards are done using the router fence . . .


. . . Or in my ugly-but-useful morticing jig.


End grain mortices can be a bit more challenging.  Short pieces fit in the jig . . .


Long pieces require a bit of a high-wire act, which looks worse than it actually turned out to be . . .


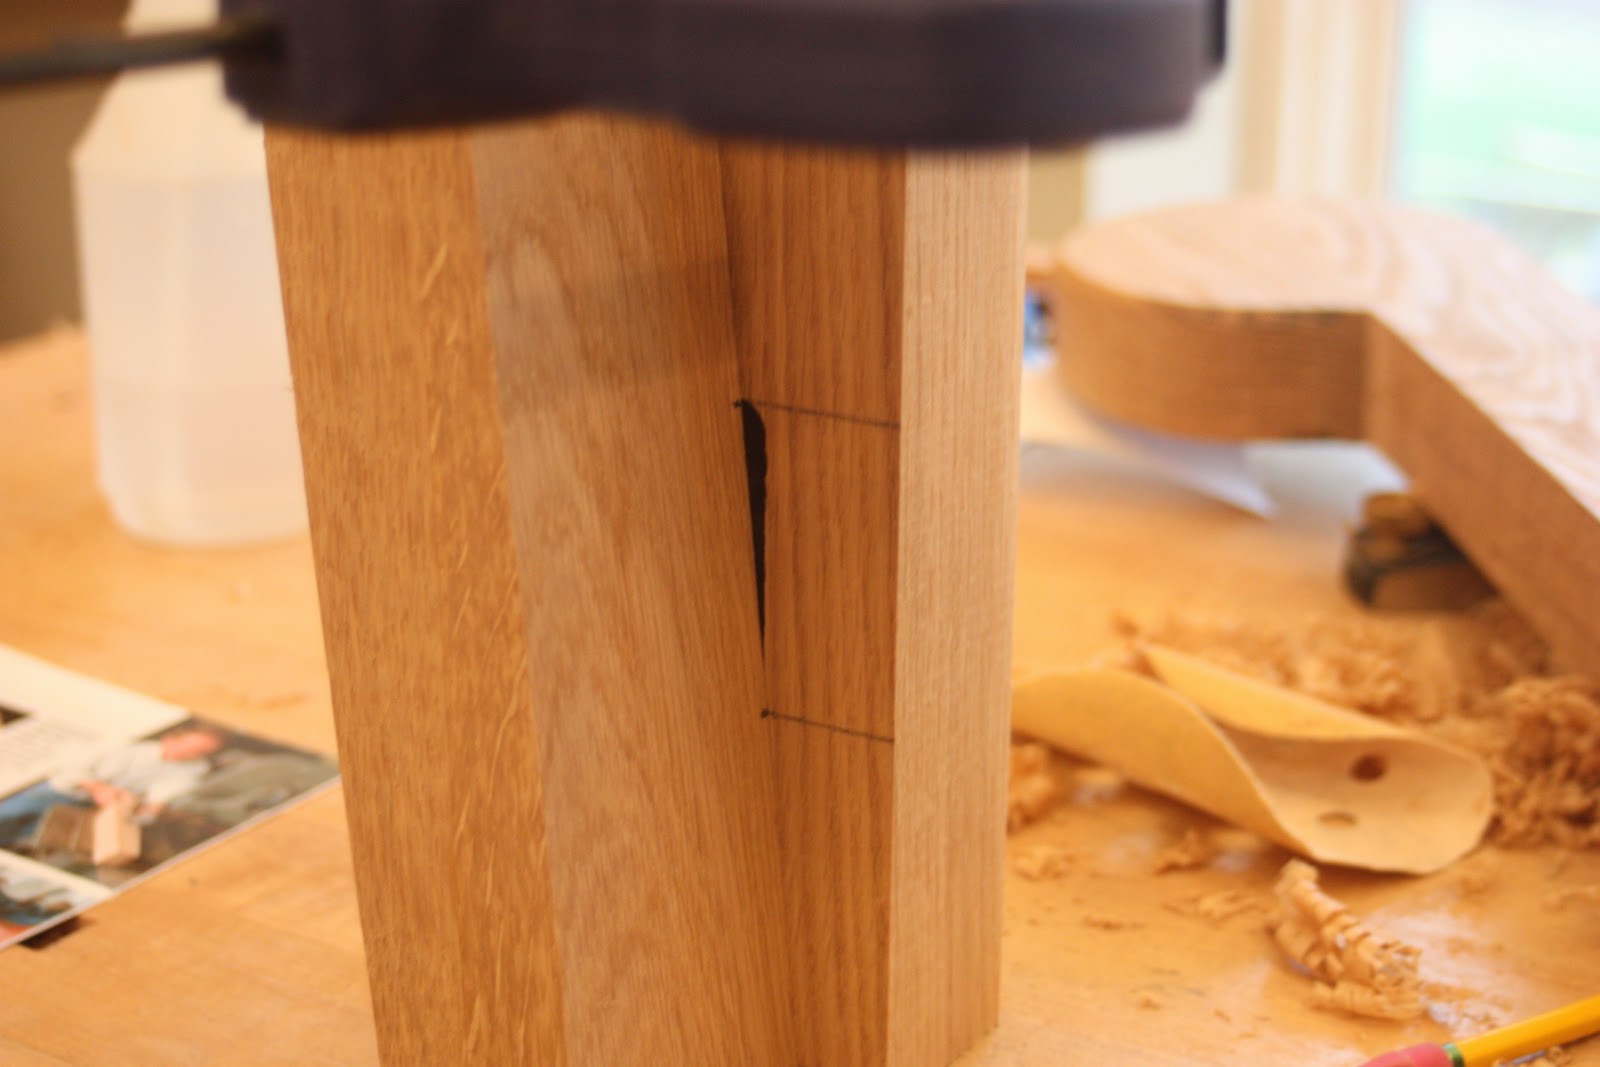
I like to cut one mortice, place it against its mating piece, and then transfer the dimensions of the first mortice.  This ensures that the joint will be properly aligned and that the loose tenon will have a snug fit (oxymoron alert!)

I've also found it useful in these situations ("found it useful" as in made the mistake of not remembering to) cut one piece from the plans, complete a dry-fit, and cut the remaining pieces with a story stick from the semi-assembled piece.  This is important as I am prone to adjust the dimensions from the plans as I go along.  Looking at the side view dry-fit above, I see that the lower side rail will need to be re-cut, as it seems to be about 1/4" shy.  Working with loose tenons makes these kind of mistakes less catastrophic.


The dry-fit, with the curved seat supports in place, shows me that I am on the right track (with one exception.)  Normally, I would think about a sub-assembly at point, but the complicated nature of the seat back joinery makes this impossible.  And we'll tackle this next time.  Cheers!

Saturday, January 14, 2012

Building A Lutyens Garden Bench -- Templates and Tricky Bits

A Lutyens Bench peeks out from among the yews at Sissinghurst in Kent
If I were to list the dozen or so pieces of furniture that have stopped me in my tracks over the years, high among that list would be the traditional Lutyens bench.  Named after the architect and frequent Gertrude Jekyll collaborator Edwin Lutyens, the bench brings a rare sense of high Victorian style to outdoor furniture.  His list of architectural credits is immense -- everything from the design for Jekyll's iconic house, Munstead Woods, the redesign of Lindisfarne Castle, and the complete city plan for New Delhi.

But among American gardeners and furniture-makers, we are most familiar with his eponymous bench.  To me, the style seems to combine the ordered design of Thomas Chippendale's Chinese furniture with the arts and crafts cloud lifts of Greene and Greene.  The challenges to building the piece are that it works best on a large scale, and that the construction process is fairly complicated -- requiring nearly every tool in my shop and taxing every muscle in my body.

Right from the start I made two decisions.  As my head was wrapped around an original design that I was building, and I wanted to nail the curves without too much frustration, I purchased ready-made plans for this particular project.  Available though Taunton Press, these plans turned out to be $20.00 well spent.  Printed on thick glossy paper, with accurate dimensions, this is a great jumping off point.  In addition, I decided to build the bench in white oak.  The white oak is, in many ways a compromise, but teak was out of the question, and 8/4 cedar and cypress were not readily available.  Research on finishes, and the advice of some artisans I trust, has led me to believe that I can make the oak viable over a twenty-year life.

Building the Templates
Taunton's plans include full-scale drawings of the most difficult components.  I traced these onto a sheet of my over sized printer paper, and made plywood templates of the crest rail, front legs, rear legs, and seat rails.  In order to get a perfect circle on the top of the front rail, (the lollipop) I drilled a hole in the center and cut a 3" radius circle on the circle-cutting jig at the bandsaw.  In fact, if you can keep this set-up intact, this will be the best way to cut the actual legs.


For the angled rear legs, I cut a single 11/2" plywood strip, then cut it into two pieces in a modified scarf joint, that gave me the proper angle.  As I've done in the past, I achieve straight lines by hot-gluing a thin 1/16" strip along any plywood edges that I have to cut freehand.


This design lives or dies by your ability to replicate the signature crest rail.  I set aside an entire afternoon to creating this template.  I started at the bandsaw and finished at my bargain-basement Grizzly portable spindle sander.  As you can see, I left the template long so that I can start and end my router passes without encountering end grain.


Cutting The Crest Rail and Front Legs
Once the crest rail template is complete, I trace the image on the 8" wide 8/4 oak stock.  To ease the transition through the tight curves I drill 1" holes right to the line.


I cut very close to the line on the tight exterior curves in an attempt to minimize catastrophic tear-out at the router table.  Plan B was to sand and around these difficult bits at the first hint of a blow up, but things went well so I routed the entire piece.

As you can see, there is a trade-off around the speed at which you rout (too fast and you risk tear-out, too slow and it burns.)  I generally opt for too slow as the final sanding removes any burned material.  Through a combination of spokeshaving, hand-sanding, and spindle sanding, I come up with a final surface.


In order to achieve a snug fit with its mirror image, I use a T-square to align the joint perpendicular with the horizontal edge of the crest rail.  This is cut most easily at the miter box.


The front legs are best cut by squaring the inside long edge and then referencing this face on the bandsaw up to the "lollipop."  Then attach the leg to the template on the circle-cutting jig and finish the cut.  This avoids potential end grain disasters.

With the two tricky curved components complete, it's time to focus on the rear legs and the base.  And we'll tackle that in the next post!
 

Friday, January 6, 2012

Contemporary Shaker Style Table -- Completed and Delivered


After an intense bout of machine time on the Hammer Beam Tables, I was looking forward to completing this Shaker table with a bit more handwork.  I keep a foot in both the machine and hand tool camps -- and I believe that they each require a different but complementary skill set.  The bottom line is that I'll use the technique that best serves the piece.  All that being said, I'd rather be planing than sanding, listening to Bach than listening to Delta.

I rough joint the edges on the jointer and then plane them, side-by-side, with my #8 Bailey to achieve perfect edges for the glue up.


Once the dark wood glue was dry, I scraped the surface and tuned my 4 1/2 hand plane.  My initial idea was to add butterfly keys to the joint between dark and light woods. But after further inspection, I felt that the curl in the maple had enough panache to carry the design on its own.


I also finished this soft-ish wood right off the blade to avoid any sanding that would spread dark walnut dust into the maple pores.  The wood planed quite well, and the high angle frog was up to the task of taming the maple curl.  I do, however, encounter the tell-tale lines of a smoother doing its work without a cambered blade -- or do I?  A quick check with a square tells me that a camber does exist, so what gives?  I take a couple of passes without the blade and find that the pesky still line exists -aha! the fault lies on the body of the plane, and sure enough, I find an almost indiscernible little ding at the back edge.  I guess the recent trip from the benchtop to the hardwood floor left its mark.  Some 600 grit paper does the trick, and the top is ready to finish in very short order.


A good example of a mixed approach is creation of the circular top from the glued-up walnut and curly maple stock.  For me, the idea of cutting this by hand never enters the picture -- I use either the bandsaw or plunge router.  And it is a case of "choose your poison."  The bandsaw, with the appropriate jig, will give you a uniformly rough surface, irrespective of grain.  The plunge router gives a better overall surface, but can be quite rough around the end grain areas.  I go with the plunge router, in its circle-cutting jig, and take light passes in different directions to approach the end grain in the most effective manner.

The top, straight from the router . . .
Now that the circle is free, I smooth the edge with a spokeshave.  The mouth is quite closed and I take a very thin shavings of chocolate and vanilla wood.  The best surface comes when you find ways to work "downhill" with the grain and skew the tool as needed.  I take a few passes with some 400 grit paper and break the edge ever so slightly.

. . . And after the spokeshave
The top is secured to the base with the usual brass bolts into a threaded insert.  I start by routing a 1/4" wide groove about 1/2" through the support (so the bolt can slide with wood movement), and drill a 7/8" hole about 1/2" deep to recess the head.  I invert the table base and mark the underside of the top to accept the hardware.  And just like that, the table is complete.

I used the spokeshave to create an almost propeller-like profile to the base support
I use my go-to finish on pieces like this -- two coats of boiled linseed oil followed by two thin coats of paste wax.  And I'm pretty happy with the result.

The base support runs perpendicular to the grain
I stayed consistent with my idea to keep the table "chunky."  There is no taper to the thickness of the legs and the edge of the table top retains its plain, thick profile.


These tables are always a little mini-woodworking class in one project -- turning, surfacing, multiple board glue-up, sliding dovetails, and finishing all in one go-- very satisfying!

Next up, a three part series of posts about the construction of a massive Lutyens Bench.  Cheers!

Sunday, January 1, 2012

The Hammer Beam Low Table . . Finished! (and finished)


Out of the shop, the Hammer Beam tables are finished and cooling their heels in my family room.  I built these as a prototype for a motif I'd like to use on several other pieces.  Overall, I'm quite pleased with the end result and I feel that in my own (very) small way I've advanced the cause of arts-and-crafts furniture.

Once the main construction was worked out, all that was left to do was to add a few details, secure the top to the base and complete the finish.  There isn't much ornamentation on this piece, but I added two little refinements.  


 The first is a chamfer on the curved beam to give a nod to the furniture of Edward Barnsley.


The second is a small triangle of exposed dowel joinery that will affix the top support to the base.  I create a template for hand drilling and then drill without the support in place. After removing the template I slide the support in place, level it, and drill through.  The dowels are installed and trimmed.  Once completed, it gives a nice rustic-yet-refined look.


I secure the top to the base by installing threaded barrel inserts into the top and passing matching brass bolts through the support and into these inserts.  My new method for installing this hardware works as well in oak as it does in walnut.  As this is a cross-grain situation, I expand the slot in support piece to accommodate the bolt as it responds to seasonal movement.

I really like the mission oak finish techniques that Jeff Jewitt writes about at his Homestead Finishing site.  He has step-by-step instructions for a variety of finish colors, and all of the products are available from him online.  I chose the "Fayetteville" finish which is a three-step process -- stain the overall color, glaze to bring out the grain, and seal to protect.  The result is an historically accurate look without the perils of ammonia fuming.


Finishes are always tricky to describe (and photograph!)  Jeff's instructions are quite good, and I found the greatest success when I mixed the gel stain (glaze) at a 2:1 ratio with odorless mineral spirits.  This increased open time and helped with the flow.  I then followed it with a paper towel, also soaked in mineral spirits.  This is really something that has to be done by feel, but once the sealer coat was in place, the tables compared favorably with several arts and crafts pieces I picked up in the UK.

What would I change?  I like the segmented construction of the base "T-Bar", but in future I will create the corbels from one block and secure them with slip tenons.  Which has led me to some serious thoughts about a dedicated machine for this purpose.  The more I work with contemporary designs, the more I like this invisible, flexible joinery system.  And this part of construction (basic joinery) is a bit of a grind with a plunge router.  I'm not sure if I want the portability of a Festool Domino, or the cast-iron brute power of a Laguna slot mortiser -- and with my next big project, a Lutyens bench, I see a lot of slip tenons in my future.

But before that, I'll finish up the Contemporary Shaker Table I started last week.  Cheers!