William Morris famously advised that you should "Have nothing in your house that you do not believe to be beautiful or know to be useful." But a different standard has to apply in the workshop. Sure, I know that there are those who collect idle Stanley 45's, perched on upper shelves like some industrial gargoyles, but shop space is too precious for mere ornamentation.
And yet . . . once in a while you see a tool that is so visually appealing that you are compelled to make it useful -- function following the love of form. For me, that tool is the Disston hand saw.
I have an appalling record with large hand saws. They have all been cheap, mass-produced items that are destined to die a rusty death-by-exposure somewhere in my back yard. And, like a fire extinguisher, when called upon to work they double-cross and leave me humiliated. Avoiding hand saws is why we buy table saws, right? However, when I purchased four circa 1900 Disston's from different people over the course of a week I knew that I had to transform the simply beautiful to the proven useful.
So, in Mythbusters style, I set out to test whether someone with no previous sawsharpening skills could turn two neglected saws (one cross-cut, one rip) into shop workhorses. The first place to turn was http://www.vintagesaws.com/ . The site is not only a treasure trove of beautiful saws from the past, an online store for Disstons resurrected and ready for service, but a source for straightforward insructions for setting and sharpening saws. As these instructions are so well-written, I won't go into detail on how I proceeded, I'll just explain how I fared with the online tutorial.
There are several steps to successful saw sharpening: jointing, shaping, setting, and filing. In order to complete these steps you will need a saw vise, a saw set, and a file. The first two items are readily available on eBay or from a number of online antique tool dealers, the files should be purchased from the site itself (it's the least you can do to say thanks for the good info.) The tutorial is in the Library section of the site.
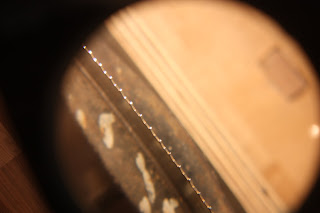
My saws were quite dull but they were not "out of joint" so just a few passes with a stinking bastard file put little flat spots on the tops of the teeth. Nor were they in need of re-setting (I determined this by sawing and finding that they did not bind in the cut.) So the main focus was on shaping and filing. The site describes the differing geometry of cross-cut and rip teeth, and gives you instructions on how to make alignment jigs to help with accuracy. The process is fairly intuitive and as long as your eyesight holds out you will begin to get in a groove. I must say that the sight of gleaming sharp edges emerging from 100 year old steel is pretty encouraging.
From start to finish the process took me about 60 minutes per saw. This includes lots of stopping and checking directions and peering through my magnifying light
As I don't know what perfection looks like, I aimed for consistency. The art of filing is the ability to manuever the file -- biasing it in a way that wears away steel to leave a tooth that is symmetrical and sharp. Maintaining the proper rake angle, and the different fleam angles for the cross-cut and rip saws is easy to understand, slightly more difficult to acheive. It is a bit like the difference between understanding a new guitar chord and playing it fluidly. By following the tutorial I finished and inspected the work. I did suffer a bit from the "Big Tooth, Little Tooth" syndrome, but overall it wasn't too shabby.
The first thing you notice, when you take a newly sharpened saw to 4/4 quartersawn white oak, is the sound -- it positively roared when it started cutting. Pull it back, let it drop, and listen. Each pass took whacking big cuts that were straight and effortless. Here's the best part: in spite of my errors, lack of experience, and general ham-fistedness, this crosscut saw went like the clappers on my first try. A twenty dollar saw, a six dollar file and an hour of my time, resulted in a woodworking Pygmalion; the sow's ear transformed.
I had similar results with the rip saw, as I dug into the cut list for an upcoming project. I did find that the rip saw cut rougher, and was harder to start than its cousin, but that may just be the nature of the beast.
I have two more saws to sharpen and I know that I will get better as I gain more experience. The bottom line is that you can do this, the margin of error is quite wide, and that the end result is both aesthetically and practically pleasing.
Next week I leave this toolfoolery behind and begin construction of an iconic piece of American furniture -- the prarie-style side chair. Be seeing you.


Haaaaa! The joy of cuting wood by hand with a sharp saw!! Love it! Thank you for a great post!
ReplyDeleteDavid
Nice one Chris-
ReplyDeleteI've gotta take some time out to get into my old nest...a few of my saws could really use some love !
cheers!
Very nice, Chris - as usual, your account reads like poetry - I'm especially intrigued by the fire extinguisher allusion and will await an account of that!
ReplyDelete