So far, the most difficult part of the project has been the sheer size and weight of the stock. Here in Chester County, PA I have ready access to 8 inch wide, 12 foot long, 8/4 white oak. But hauling it around the shop, cutting it to the proper dimensions, and surfacing it becomes a big issue. In order to save my back I cut each piece to +/- 6 inches (to allow for snipe) of its final length. I don't even think about using the table saw to cut to width because of the extreme internal movement of flat-sawn white oak. In fact, it wants to twist so much during sawing that even the band saw is out of the question. Out comes the rip saw and wedges, and once chilly shop seems a bit steamy.
I cut this about 1/4" oversize, let it sit for a couple of days and pass one edge and one face on the jointer, then use the thickness planer to reach my final width and thickness.
The Back Legs
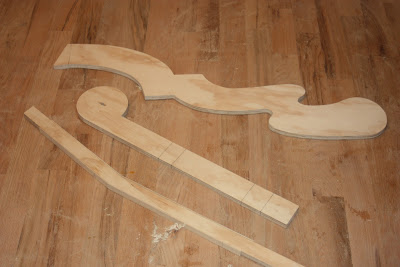
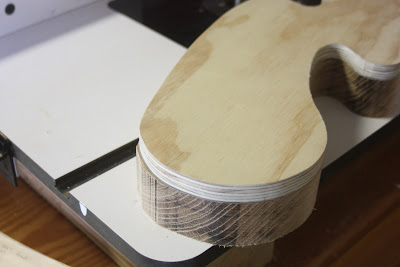
The most complicated element of the base is the back leg segment. In order to achieve the necessary heft, you must face glue two, 3 1/2" by 2" pieces of stock and band saw out the rough profile. I entertained notions of using two pieces of stock and fashioning some fancy scarf joint, but this bout of insanity passed and I went with the most straight-forward approach. The key is position your template so that you hide the glue line on the lower half of the leg.
I trace the template and rough cut each leg on the band saw. Outside faces are smoothed easily with a hand plane.
The inside faces are worked first with the hand plane, then a spoke shave, then a quick pass on the spindle sander at the interior angle. Once the two pieces match I use the template to cut them to length with each end sporting the proper angle.
Rails and Stiles
Like it or not, the next part of the project enters into the realm of chair making -- and I always find this both fascinating and slightly complicated. I like making chairs, and it is not really difficult if you can keep all of the angles straight in your head and remain mindful of the forces at work. While I won't attempt to give a step-by-step tutorial, it is easy to keep some general notions in mind:
Looking at a side view, all rails join the front leg at a 90 degree angle. They join the angled back leg at matching obtuse/acute angles depending on whether they meet above or below the back leg bend.
 |
| The dry fit looks good, the gaps are because I have it pulled slightly apart. |
Looking at a front view, all rails join at a 90 degree angle (there is no "splay") and follow the lines of the leg to which it connects. This means that they are 90 degrees to the ground in the front, and angled along the same lines on the back.
Joinery
All joinery is done with loose tenons. Mortices that are on the faces of boards are done using the router fence . . .
. . . Or in my ugly-but-useful morticing jig.
End grain mortices can be a bit more challenging. Short pieces fit in the jig . . .
Long pieces require a bit of a high-wire act, which looks worse than it actually turned out to be . . .
I like to cut one mortice, place it against its mating piece, and then transfer the dimensions of the first mortice. This ensures that the joint will be properly aligned and that the loose tenon will have a snug fit (oxymoron alert!)
I've also found it useful in these situations ("found it useful" as in made the mistake of not remembering to) cut one piece from the plans, complete a dry-fit, and cut the remaining pieces with a story stick from the semi-assembled piece. This is important as I am prone to adjust the dimensions from the plans as I go along. Looking at the side view dry-fit above, I see that the lower side rail will need to be re-cut, as it seems to be about 1/4" shy. Working with loose tenons makes these kind of mistakes less catastrophic.
The dry-fit, with the curved seat supports in place, shows me that I am on the right track (with one exception.) Normally, I would think about a sub-assembly at point, but the complicated nature of the seat back joinery makes this impossible. And we'll tackle this next time. Cheers!


