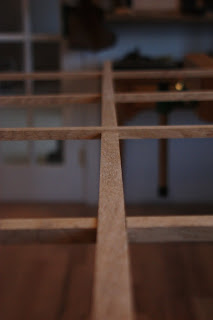
There is a dramatic shift from the heavy, nearly timber-frame, work of the rails and stiles to the light and flexible construction of the kumiko. At last, my hand tools seem in proportion to the project and I could set out at a relaxed pace. The individual pieces would are 3/4" wide by 1/2" thick. I thicknessed the oak board to 3/4" and cut 1/2" slices on the tablesaw. With these two operations complete I moved out of the "shop" and into the studio.
For aesthetic reasons, I wanted an odd number of panels in each direction. I went with five-by-five (keeping the same number of panels in each direction makes each panel proportionate with the entire piece.) This is where a story stick is a must. The internal dimesions were 58 1/8" by 70 7/8". Subtracting the width of the four kumiko (that divided each dimension into five panels) reduced each by 3" (4x 3/4"). Dividing this by five gave me panels that were 11.025" by 13.575". I threw in the towel on the Imperial measurement system at this point and converted to metric, giving me 280 mm by 345 mm. I cut a stick each of these lengths, and in combination with a 3/4" measuring block, stepped out these measurements on a longer story stick. I will use this to mark the half-laps on both the kumiko and the frame.
I ganged together the kumiko (first the verticals and then the horizontals) and marked them together. If I were using a dozuki I would have cut them at this point as well, since the thin kerf holds well in even a knife mark. As I am using Western saws, I will cut them individually (more on that in a moment.)
There are several traditional ways to arrange the kumiko in the frame. The most simple is a series of half laps, all on the same side of each of the horizontals and verticals (flat weave). To assemble you just lay down all the verticals with the half laps up and set the horizontals on top, half laps down. The result looks something like this:
If you alternate the half laps on one piece, but keep them on the same side of the other, (allowing you to weave the horizontals through the verticals in an alternate stick weave) it looks like this:
And still a third way is to alternate both the horizontals and verticals to get what is called an alternate lap weave. It is the most complicated as the joints are cut on alternating faces on each piece. It also gives you the most stability. Alas, as I was making only two grids, I made only the first two patterns. Now, from the side from which you will be cutting, mark the depth of each joint with your gauge. As this is 1/2" thick, the half laps will be 1/4" deep.
The only thing remaining was to cut the individual joints. What can I say? If you like this sort of thing, this is just the sort of thing you will like.
The essence of all joinery is so simple -- determine the line, mark the line, cut the line. Master these three elusive steps and your days will be happy ones. This following method of cutting the kumiko brought me as close as I can get to joinery Nirvana.
Begin by exagerating the knife marks with a chisel and then cut the little indentations (from the waste side) in which to rest your saw blade. This not only ensures that you cut on your mark, but it places the set of the teeth below the surface, giving the joint a razor edge.
Cut to your depth on each side. Depending on your temperment you can chisel every joint as you cut, saw the joints on one kumiko and chisel, or do all the sawing and then all of the chisel work in one go. Removing the waste is a two step process. Your first cut removes most of the waste and your second cuts to the line. As you probably know, the geometry of a chisel makes it that when it encounters too much resistance, it moves back from the bevel edge, "overcutting" the line. If you are taking only a sliver (less than 1/16") it will stay true.
For me, this kind of work hits the sweet spot of hand tool work. Sure, you have to concentrate, but your mind is free to listen to Haydn on BBC Radio 3, put on a Tom Waits CD, or sing "Love Potion #9" at the top of your lungs. Once completed, the kumiko snapped together quite easily. The slight wood movement that occurred after cutting actually put the whole grid in tension and held it in place.
And to top it off, I was rewarded with one of the most spectaclar "moonrises" I've ever seen out of the shop window.


Is it just me or is metric much easier for woodworking? I seem to do all my design and in shop measurements with metric these days. I am still stuck with those english routers but my chisels speak metric just fine :) Nice project looking forward to the completed screen.
ReplyDeleteCyrus-
ReplyDeleteI agree. In fact, I'm finding that since I really prefer my Japanese chisels, the transition is pretty easy. I guess I'm going to replace my Sheffield-made mortice pigstickers with some of those massive Hirsch jobs.
Chris
Nice project and I like your photography. What kind of camera do you use?
ReplyDeleteHi Jeff-
ReplyDeleteThanks. I use my wife's Canon Rebel XSi with a telephoto lens. I know squat about photography. I use the setting with the little green box or the one that says Tv (which I think automatically adjusts the shutter speed to match a set aperture)
Spacify is one of the best onlineFurniture Shops that provides you quality furniture for your home.
ReplyDeletethanks your sharing, your project and I like your photos
ReplyDelete