

I've been looking forward to inserting the butterfly keys on Imperfection # 1 since I first saw the checks on this highly figured board. These inlays bring to mind George Nakashima and all of the great furniture and noble ideas that he brought to the craft. And I must say that when Tyler mentioned them on teal and gold, his hip, artsy blog , I remembered how satisfying it feels to tap them home with just a bit of glue -- each tap snugging the carefully-cut key into its recess.
Sometimes these keys are completely cosmetic, inserted to add interest or to justify the inclusion of a tiny crack that poses no structural threat to the piece. In this case they are very necessary as they need to span a fissure of nearly 1/4".
My method for making the keys, cutting the mortices, and truing the butterflies is fairly old school, with a couple of my own quirks.
I cut the butterflies by hand. In my opinion, a great deal of the charm in these details lies in the slight asymmetry that comes from hand sawing each piece. Those templates with their sterile forms and perfect geometry always put me off. In many ways this is just like cutting a double-sided tail in a half-blind joint. And like executing this joint, success for me comes when I keep in mind which faces will show in the finished product.

I cut these butterflies on a 1:8 ratio, using my dovetail marker on 1" maple stock. As much as I wanted to create slim hourglass shapes, I needed to keep some meat in the middle for strength. I like the subtle contrast between cherry and maple; I suppose that if I really wanted to make it pop I would have gone with holly or box keys. The grain should run the length of the key. I like to lay them out, angle the tops, make the cuts on the side, and free them all with one crosscut along their bottoms.
After laying out the shapes my aim is to make sure that the bottom of the key is ever so slightly narrower than the top. To prepare the top of the keys I take a few passes with a low-angle plane, across the grain, creating an angle toward the back of the key. For the zig-zag sides of the key I start my saw cut at the outside of the line at the top and on the inside of the line at the bottom. This biases the cut to something like a 1 degree angle. To quote James Krenov, "just enough so that only you know that it's there." Once the keys are cut, a little cleanup with a wide chisel makes the edges true -- straight lines and consistent angles are important.
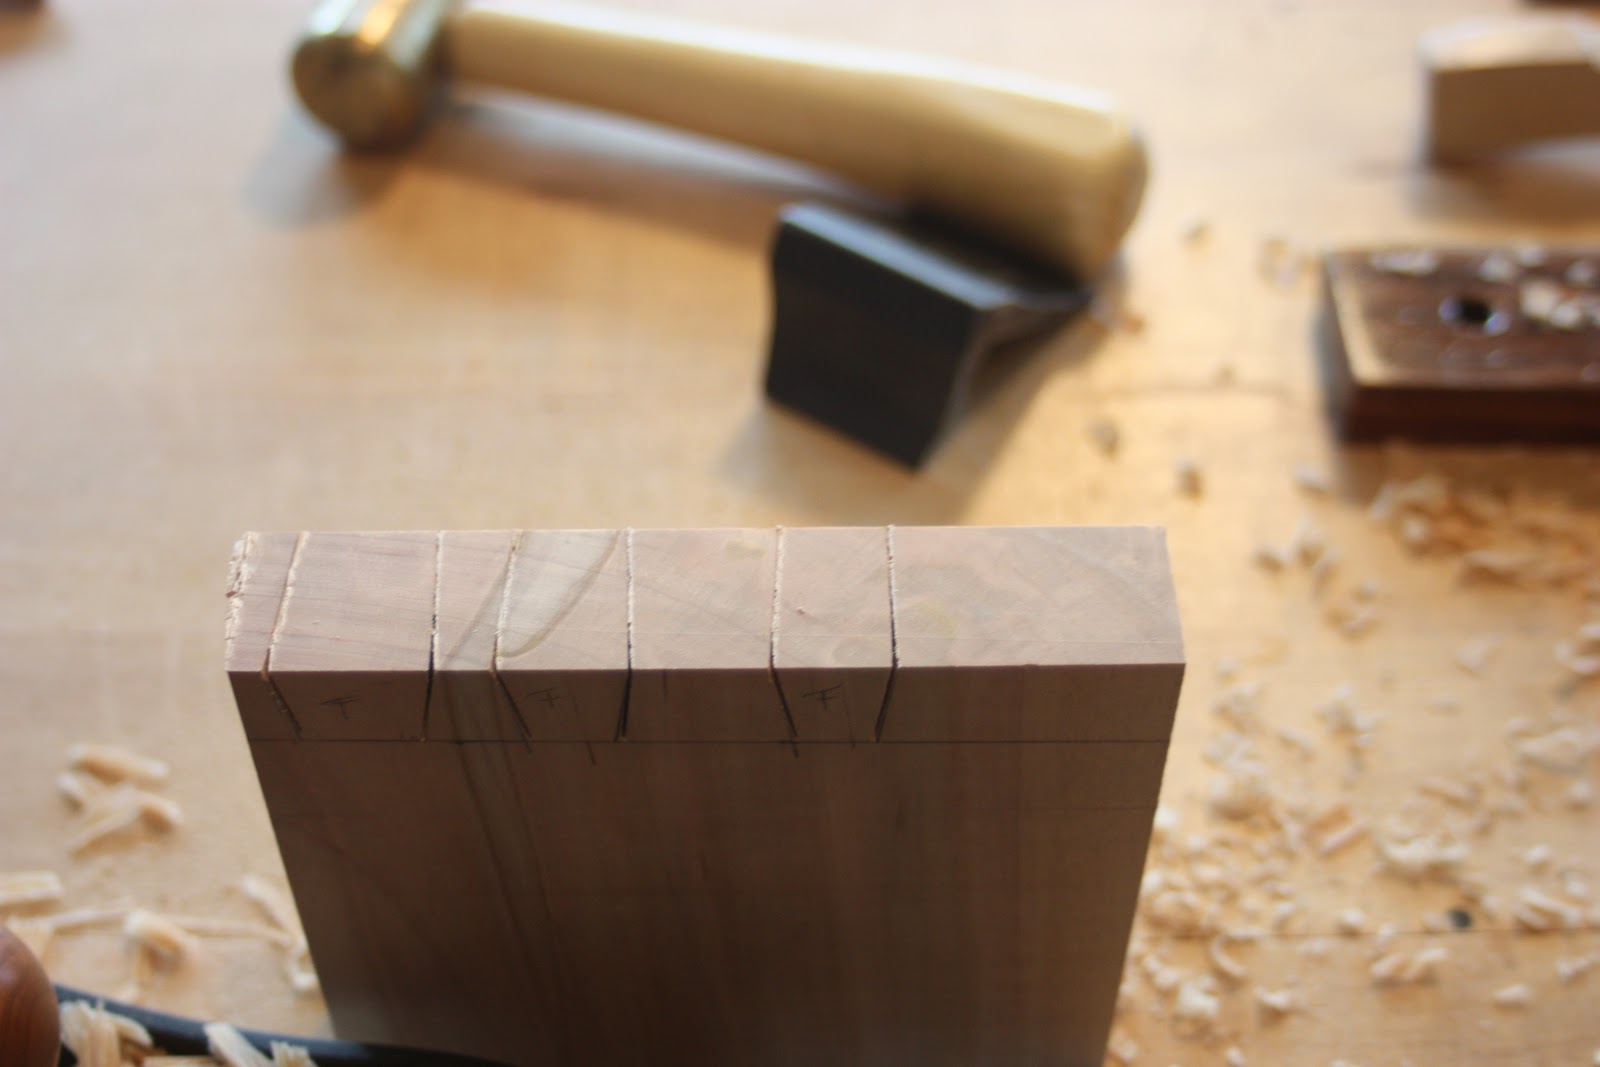
I transfer the shapes of the keys to the table top with a sharp pencil, tracing around the slightly narrower bottoms, just as they will be placed in the top. I find that if I cut the mortice to the outside of these pencil lines it give you clearance to insert the key without fiddling. And because the key gets slightly wider from bottom to top, it snugs itself as it is inserted. I do use a router to hog out most of the waste, but not in the traditional manner.

I have never liked working a router freehand, regardless of the situation, and in particular I don't like moving it within a scribed line -- too many things can go wrong. Instead, I use a 1/4" spiral bit and plunge it into the waste area. The result is no broken bits and no irretrievable disasters here at step 432 of the project. I then incise the line with a chisel and remove the remaining waste.

Just a quick word about the thickness of the keys. The recess is about 1/2" deep and the keys begin life at about 1" thick. I'm unconcerned (within reason) about how deep these get inserted as long as they don't bottom out before they are snug. I use just a bit of glue around the bottom edge of the key as it goes on. and a bit of glue in the mortice -- but not much. As much as I'd like to trim these with a flush cut saw, I don't. The maple is hard, a bit chunky, and I've found that a delicate saw balks at this challenge. Instead I use my dovetail saw and remove the 1/4" that remains with a block plane.

When using the block plane I put a sheet of paper or masking tape down before I start. The result will be a key that protrudes by that thickness (which sometimes I leave) and can be easily sanded with 220 grit during final surfacing. In this case, I sand to 400, to get a bit of sheen on the top (contrasting with the imperfection of the mended crack.) A quick bit of work with the spokeshave readies the edge for finish.

I couldn't help myself. The top picture shows how the table is coming along with a quick coat of boiled linseed oil. I'm pretty pleased with the look, but there are a couple of little cosmetic tricks I need to do before it is complete. The last step is to secure the top to the pedestal. As I want to display the figure and the butterflies, I'll do this via a tilting mechanism.
The final post in this series will have a (mercifully short) description of aforementioned tilting mechanism and final pictures of the Shaker Round Stand, The Single Drawer Sewing Stand and this, Imperfection #1.
Cheers, Merry Christmas, and let me know what you think.

Thanks Dale. It's funny, I have a friend who is more of a production-oriented kitchen cabinet guy. He seems to think that I just don't know about things like dovetail router jigs and butterfly templates. When he learns that I am aware of their existence -- but choose not to use them -- he looks at me like I'm crazy!
ReplyDeleteYour keys look great and I understand your apprehension to free hand a router on such a nice pice of wood. I think you struck a good balance between power tools and hand work.
ReplyDeleteWhile I use mostly power tools, I have the itch to learn how to properly use a nice plane, etc. There is a certain look to things crafted by hand that I admire.
Looking good Chris! I pretty much tackle the bowties the same way. One difference though is i make the bowtie's edges square and chisel the hole slightly off square. Thanks for the plug!
ReplyDeleteSending them home is so enjoyable.
-tyler
Jeff- I started my woodworking as powertool guy, but sort of moved more toward a "middle path" The good news is that (except for a slight weakness for anything Lie-Nielsen) most of my hand tools are vintage and very reasonable. I don't go in for Bedrock Planes or Stanley #1's. Also, some of the best lessons I've learned have been while tuning and testing old tools.
ReplyDeleteTyler -- I want to experiment with your method. BTW, it was your post with the keys in walnut that put the idea in my head for this table -- thanks.
Looks great! I cant wait to see the finished product.
ReplyDeleteMerry Christmas
looks great chris-
ReplyDeletehappy ho-ho and all the best in 2011.
I love these joints, great as usual. I love the blog, thanks
ReplyDeletelook great ! thanks for your sharing
ReplyDelete