

We're on the homestretch now, with the table flat, the base built, and the scent of TransTint is in the air. I really enjoy making breadboard ends -- the process is very tactile and represents everything that is good about hand-made furniture. As with most joinery, it helps me to start with a known dimension for the "mortise" element and then dial in the fit of the "tenon" element.
The thickness of the top is approx. 7/8" so I'm going to go with a tongue thickness of 3/8". I will cut this groove, on visual center, on the breadboard end piece that is about 1/16" thicker than the top. I say visual center as I just eyeball this on the router table. Inevitably, one cheek is ever-so-slightly thicker than the other and I orient this on top to ensure that I cover the end grain of the table field. I may be over-cautious in this regard, but coming up too thin on the top is an automatic reboot in the process. I cut this to a depth of 1/2" on the router table.

Setting this aside, I begin to create the tenons on both ends of the table top. I make a rough and ready jig that sandwiches the top between two pieces of plywood that creates identical fences on both sides of the board. I measure back from the edge, with the bit in place so that it will cut a 1 1/8" tenon. I then make a spacer block of this width that will align the jig to the correct distance from the edge every time.

I measure the width of the cheek on my mortised end piece with digital calipers, reduce it by a few mm, set this as the final depth of the router, and cut to completion in several passes. I reduce it by that little bit to ensure that the end piece will stand proud of the table top. With the dual fence in place, I flip the piece and rout the other side to within a few mm of completion. Checking the actual fit with the end piece, I continue until there is a snug fit.

Now I make my story stick for the tongue. The tongue features three longer tenons that will be 1 1/8" in length -- adding the real stability to what is by nature an awkward cross-grain situation. These tenons will be pinned with a dowel through the end, and depending on the orientation, the holes for the pins will be widened to allow for wood movement. I lay out the tenons symmetrically so that if it gets accidentally rotated 180 degrees between passes on the router table, the piece will still fit.

I mark the tenons and cut them out by hand. From the tenons I mark the corresponding mortises on the end piece, adding approx. 1/4" on the two outer mortises to allow for seasonal movement. I then return to the router table and "plunge cut" these mortises against the fence (I'm not detailing this procedure because I'm not sure if it is a good practice -- proceed at your own risk.) A quick dry-fit lets me know that I am on track.


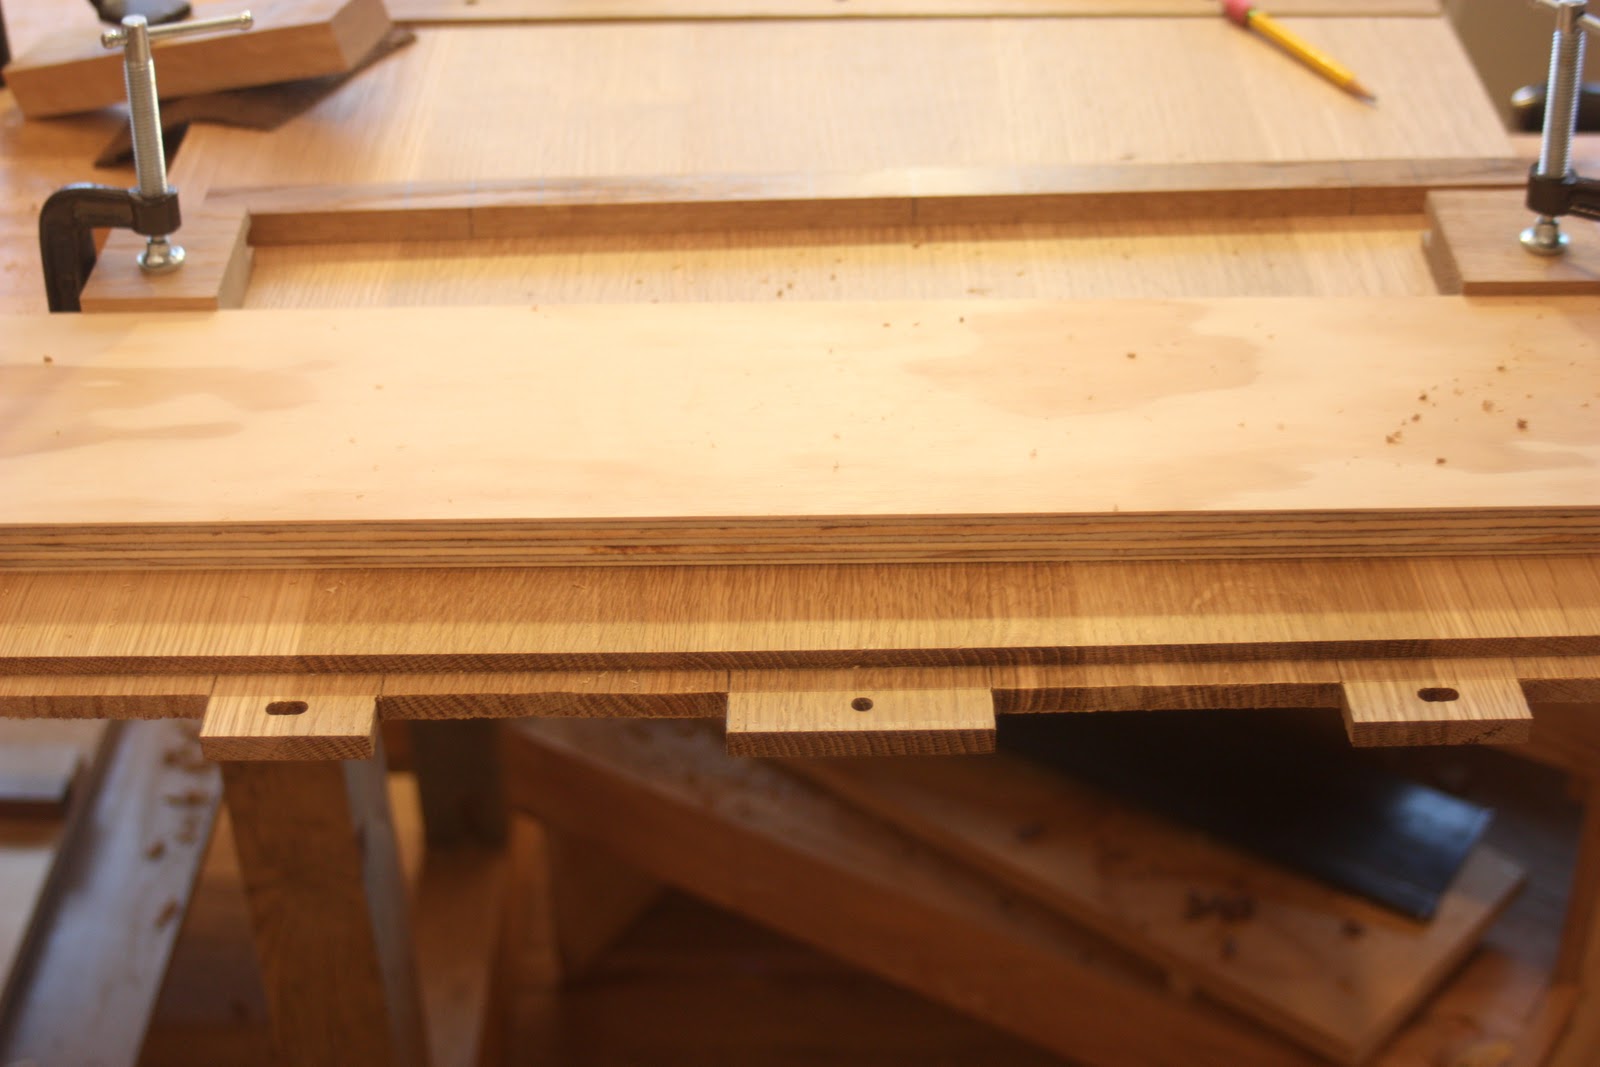
As you can see, I've cut the end boards slightly thick and overly long to allow for an exact fit. My next step is to trim these ends, along with about 1/8" from each edge of the table top, to bring to the final dimension. As my sled isn't large enough for this piece, I friction fit a spacer between the two end boards and run this edge along the table saw fence to the correct size. Once one side is cut. it can run along the fence to cut its opposite number.

Using my 4 1/2 smoothing plane, complete with high-angle frog, I then plane the top of the end board to match the height of the table top. I find that if I keep the end board attached to the top, pulled away by about 1/2", I can plane without the risk of making a cross-grain gouge, and monitor the fit with a square. In practice, I leave the end board just fractionally proud.

With the edges cut to fit and square, all that is left to do is to pin the end boards to the tenons with dowels in a manner that addresses the cross grain nature of this joint. I find that a plunge router acts as portable drill press, positioning the hole very accurately and spinning the bit at a speed that discourages tear out. While it might seem intuitive to use the edge of the end board as a reference for plunging these holes, I've found a method that I like better. If you create a fence that is attached to the table top, you can drill the holes through the end board and tenons in one go, remove the end board, widen the two holes on the outside by about 3/8", without readjusting the fence. This gives you a very clean channel for the dowel to ride in during the table top's seasonal journeys.
The best part of this is that you have already built the fence.
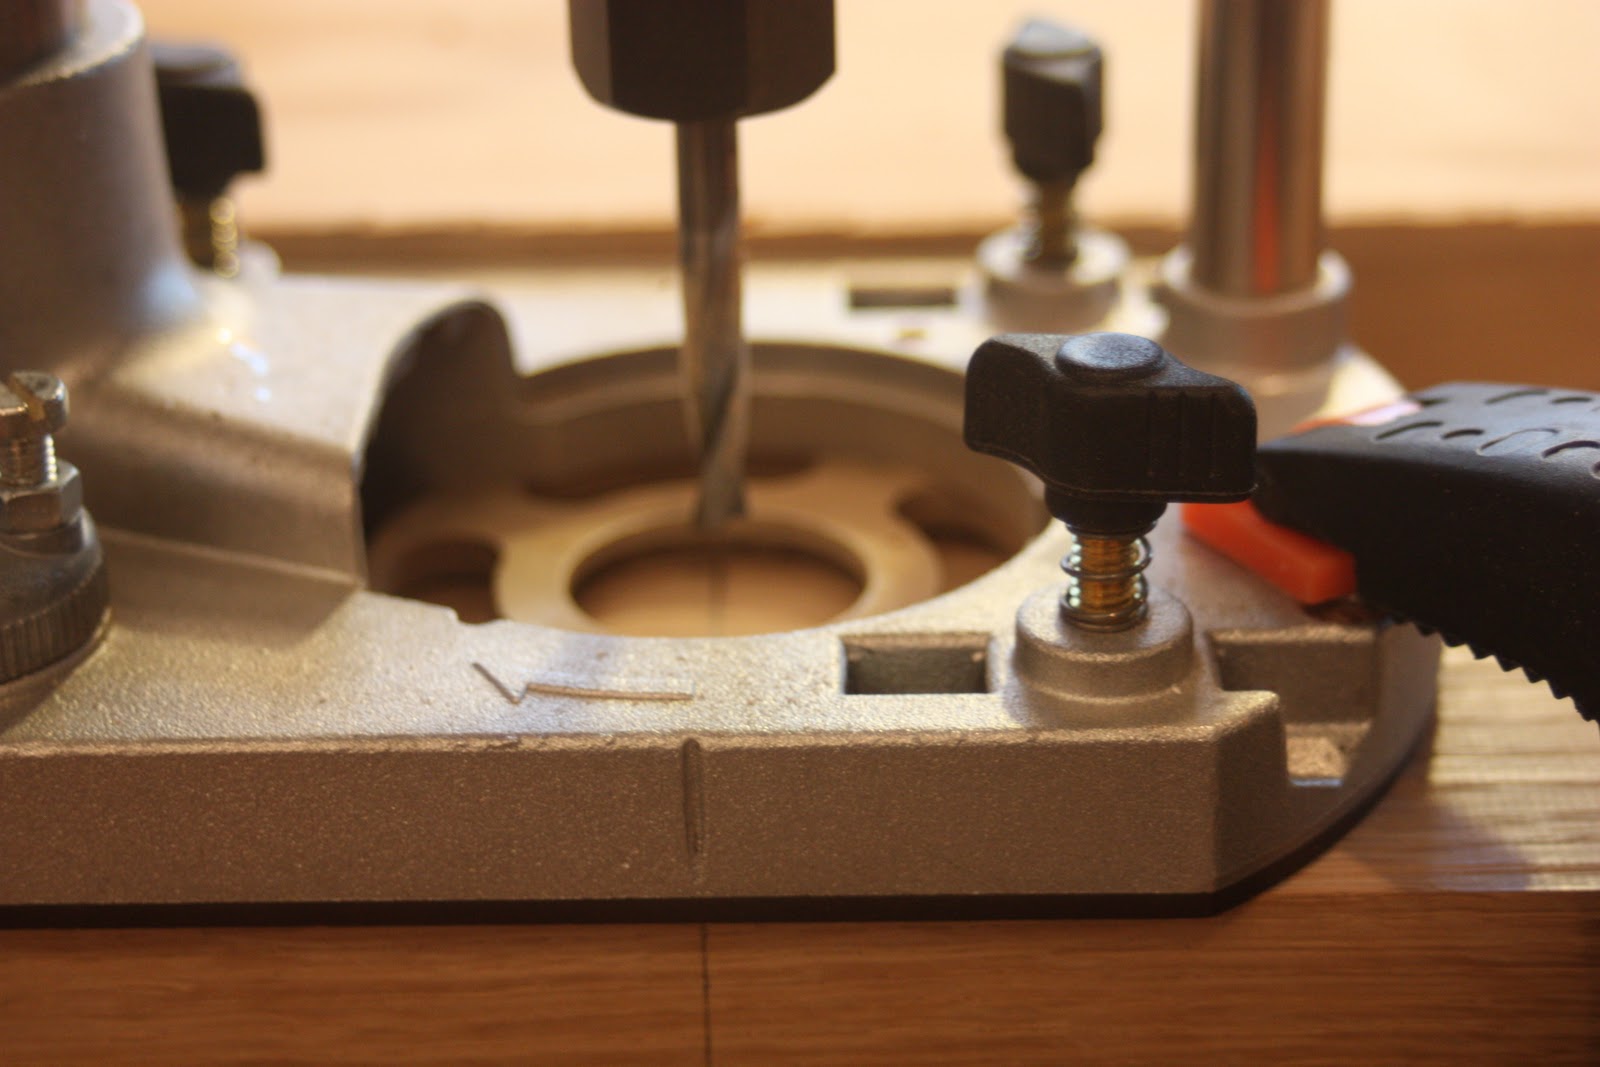
Using the jig without a spacer would place the bit dead center of the 1 1/8" original width. Experience has taught me that this is too close to the short portion of the joint. Pushing it out 1/4" places the hole completely in the long tenon portion of tongue. This is better both functionally and aesthetically. Now insert a 1/4" spiral bit and plunge through the three marked holes for the dowels.
Remove the end board, and expand the two outside holes to create a channel somewhere in the vicinity of 5/8" wide. Now, the top is free to expand with the heat and humidity of summer, and contract in the winter dry spell.

The final step is to re-install the end board and peg with the dowels. I place bit of glue only on the center tenon and reassemble. Using a cotton swab, I coat the inside of the center hole with glue, dip the peg in glue, and drive it home. The excess glue will fill any gaps created by slightly out-of-round dowels. Reaching from underneath, I place a bit of glue in the outside holes, but only deep enough to coat the bottom cheek portion. I drive a peg 3/4 of the way through, apply glue to the top of the dowel, and drive it home. My objective is to keep any glue from traveling down to the tongue portion of the joint. In all fairness, I'm not sure if excess glue would cause a problem, I just want to ensure that the joint will work properly.

After this cures for a few hours, I trim the dowel with a Japanese flush cutting saw, take a few passes with a block plane, and finally make a couple of passes with some 220 grit paper to make sure that I've removed any excess glue and to clean up any "bench rash." be sure to take care when using the delicate flush-cutting saw on the white oak dowel. I've read that this saw is not really designed to cut tough American hardwoods, so a light touch is important.
Several times along the way I used my smoothing plane to clean up the surfaces. In a couple of spots I pulled out the shoulder plane to fine-tune the intersection of the end piece and the table top, and I finished the ends of the end board with a few passes on the shooting board. All of this is intuitive, and you won't go too far wrong if you go with your gut on these decisions.
This turned into a much longer post than anticipated, and I'm sure that I've left something out. Please feel free to shoot me a note i if you have any questions or see a better way to approach this most satisfying part of this project. Cheers.
Next up: Final construction and a bit of finish.

Looks great Chris-;)
ReplyDeleteThanks, Tom. I suspect that you would use a moving fillister to cut the tongue portion. I've been thinking about buying one to reduce the amount of router time on this leg of the project.
ReplyDeleteVery nicely done Christopher – despite the use of the router!
ReplyDeleteNice work, i enjoyed your process.
ReplyDeleteBeautiful wood - have I said that already? How do you like your router. I have one just like it.
ReplyDeleteHey Jeff- I like it as much as I can like a router, but I have a real love/hate relationship with it. It has lots of power and I can set final routing depths easily by first zeroing it out and using spacer blocks to set the plunge stop. It is a bit top-heavy, but I'm not sure if that can be avoided.
ReplyDeleteWith my old router, I could easily turn it upside down and change the bit. This one won't stand on its head, so changing bits is a little cumbersome and the tiny machine screws for the bottom plastic plate get stripped out when it is used in my router table. Otherwise I like it OK.
ReplyDeleteI love this, great article Yes
ReplyDelete